Are users complaining about notes disappearing from their Office 365 mailboxes? The reason could be retention policies, which may be automatically archiving items. In this case, users can assign personal retention tags to folders or items to prevent archiving.
This post will show you how to create a personal retention policy tag to disable archiving and how to apply the tag to the Notes folder inside the mailbox.
Table of Contents
Requirements
- Access to a Microsoft 365 tenant.
- Your administrator account must be assigned the Retention Management role in Exchange Online. This role is already assigned to the Compliance Management, Organization Management, and Records Management group members.
Create a Personal Retention Tag
To prevent the Notes folder contents from being archived, a personal retention policy tag that disables archiving must be assigned to the folder. Newer tenants may already have this retention policy tag available. If not, this section will show you how to create one.
Method 1: Using the Microsoft Purview Portal
- Log in to the Microsoft Purview portal.
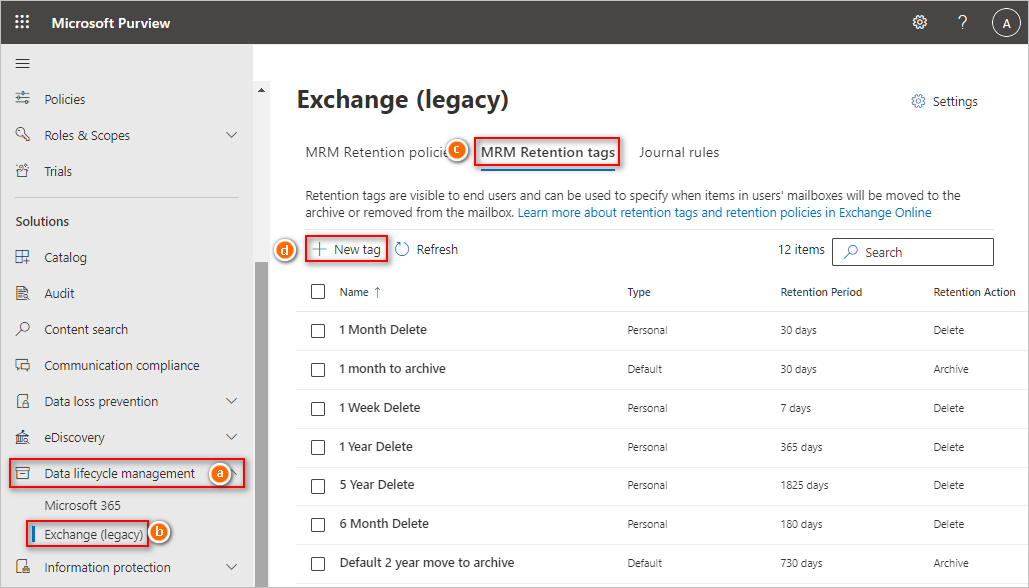
- Navigate to Data lifecycle management > Exchange > MRM Retention Tags > New tag.
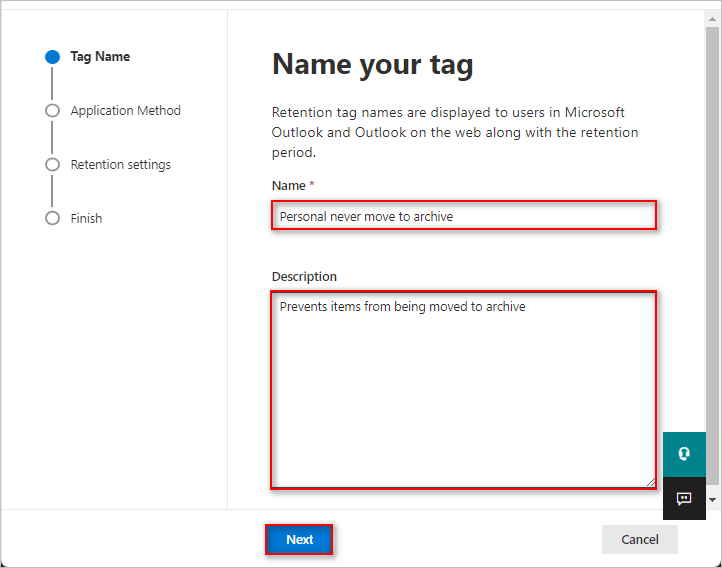
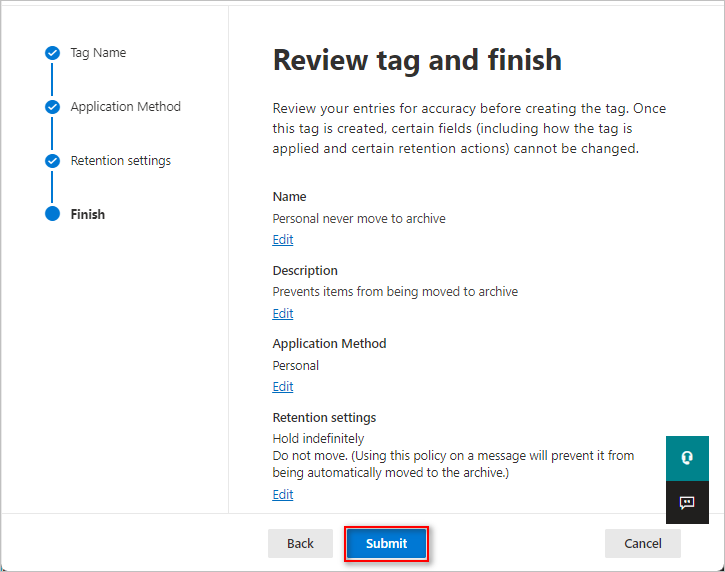
- Under the Tag Name, type the name and description of the new tag and click Next.
Name: Personal never move to archive
Description: Prevents items from being moved to archive
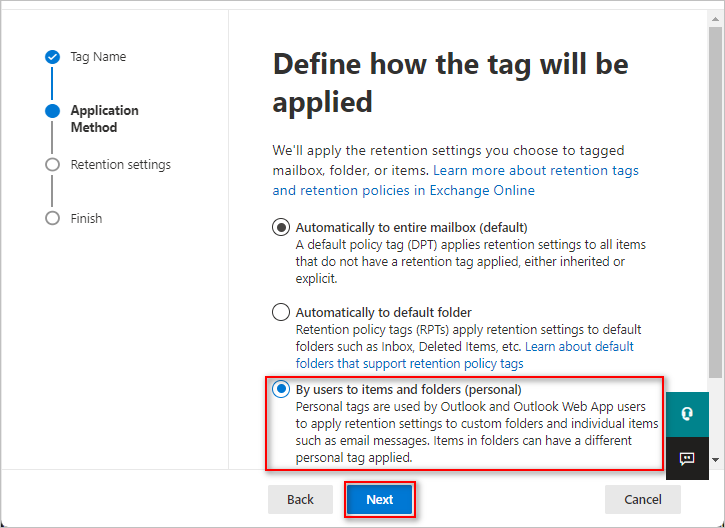
- In the Application Method, select the By users to items and folders (personal) option and click Next.
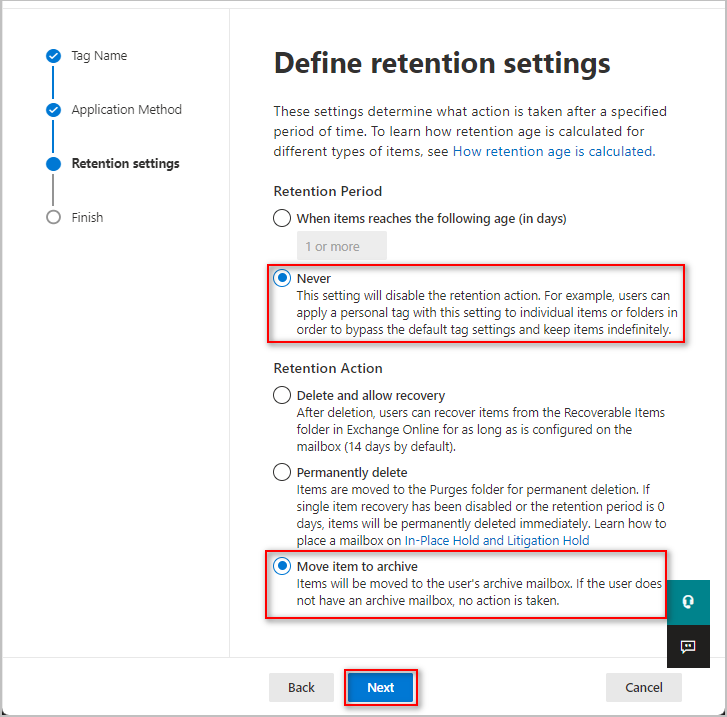
- Under Retention Settings, select the following options and click Next.
- Retention Period: Never for the retention period
- Retention Action: Move item to archive
- On the last step, click Submit.
- After the tag is created, click Done.
And you’ve successfully created the personal retention policy tag.
Method 2: Using Exchange Online PowerShell
- Connect to Exchange Online PowerShell.
- Next, run this command to create a new personal retention policy tag:
New-RetentionPolicyTag `

-Name "Personal never move to archive" `

-Type Personal `

-RetentionEnabled $false `

-RetentionAction MoveToArchive `

-Comment "Prevents items from being moved to archive"
This PowerShell command creates a personal retention tag in Exchange Online with the following properties:
- Name: Specifies the name of the retention tag. In this case, it’s set to “Personal never move to archive”.
- Type: Specifies the type of retention tag, either Personal or Default. In this case, it’s set to Personal.
- RetentionEnabled: Indicates whether the retention tag is enabled. Here, it’s set to $false, which means the retention tag is disabled.
- RetentionAction: Specifies the action to take when the retention period expires. In this case, it’s set to MoveToArchive, which means the items will be moved to the archive mailbox when the retention period expires. Note that since RetentionEnabled is set to $false, the retention action won’t be applied.
- Comment: Specifies an optional comment for the retention tag. In this case, it’s set to “Prevents items from being moved to archive”.
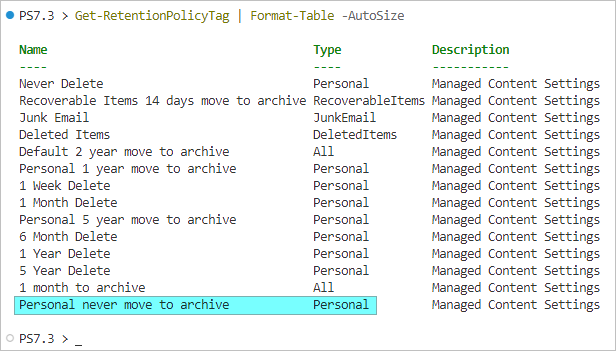
- To confirm, run this command to list all retention tags. The new tag you created should be on the results.
Note. Check out how to add calendar permissions in Office 365/Exchange via PowerShell.
Apply the Retention Tag to Don’t Archive Notes
Now that you’ve made the retention tag available, users can now assign it to their respective Notes folders. But, this step is only applicable using Outlook on the Web (OWA) and not in the Outlook desktop client.
Note that we’ve only created a retention tag and did not include it in any existing retention policies. This means that the tag we created is not a readily available option to the users, but it can be added in a few steps.
-
- The user logs in to their mailbox in OWA (https://outlook.office365.com/mail).
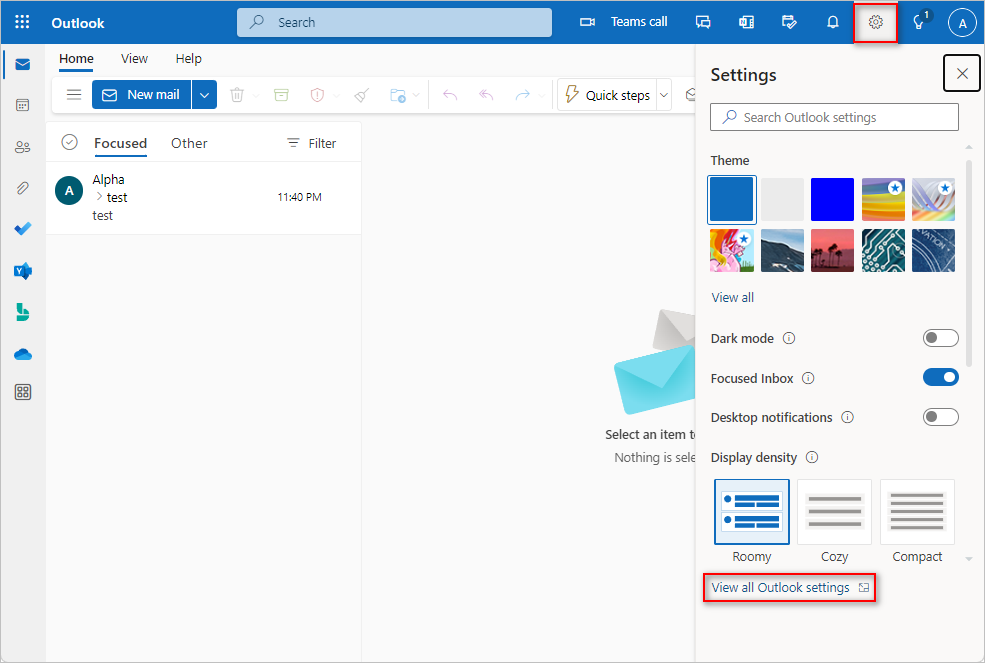
- Click Settings > View all Outlook settings.
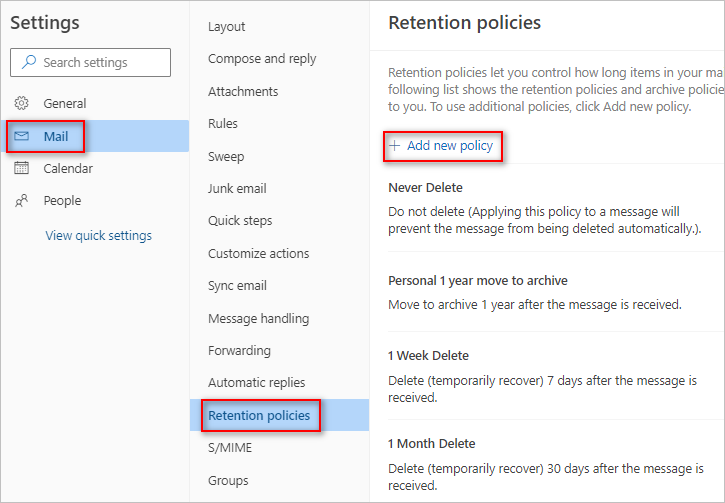
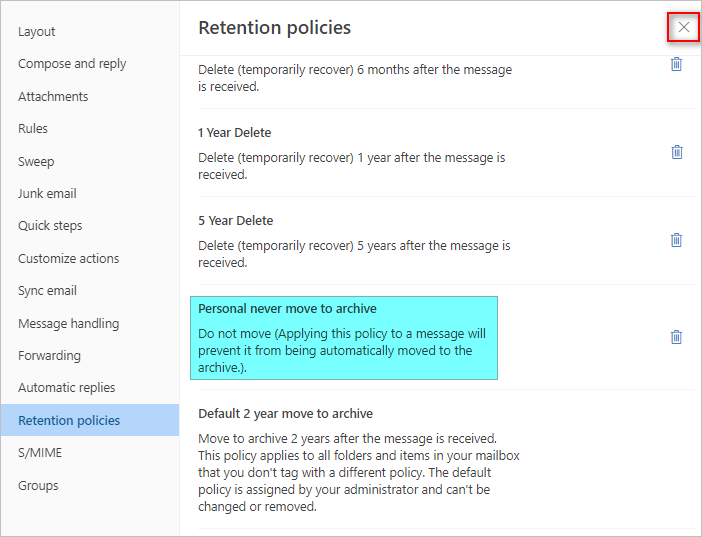
- Navigate to Mail > Retention Policies > Add new policy.
- Select the Personal never move to archive policy and click Save.
- Close the Outlook settings.
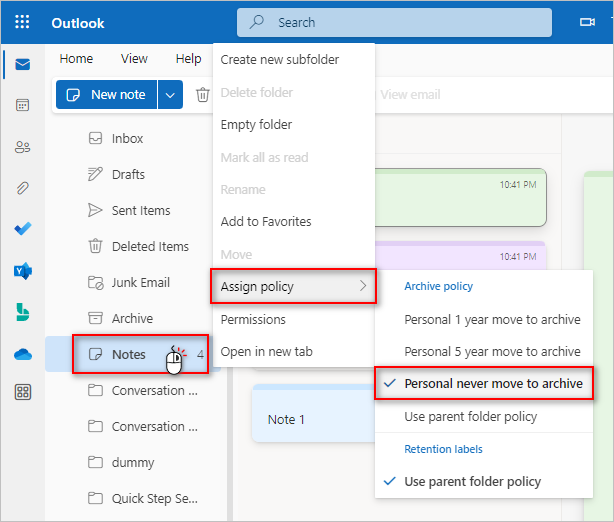
- To apply the retention policy, right-click on the Notes folder, click Assign policy and click Personal never move to archive.
That’s it! The Notes folder contents are now excluded from archiving.
Conclusion
Archiving is a valuable feature in Office 365 to save storage space and keep inactive items organized. But, it can also cause issues if important notes are automatically moved to the archive folder.
By following the steps outlined in the blog post, users can exclude the Notes from being archived and ensure that important information remains easily accessible.
This simple solution can help users manage their notes more efficiently and avoid any potential issues caused by automatic archiving.

 And you’ve successfully created the personal retention policy tag.


 That’s it! The Notes folder contents are now excluded from archiving.
6 comments
….yeah….NO, this doesn’t work. That option doesn’t exist when Notes is right-clicked. Next try please….This problem begs a solution….
It didn’t show up for me at first either, I had to go into options, retention policies, see the list. Then go back to inbox and refresh. Once I did so the options for different archive options appeared. Before then it only showed “Use Parent Folder Settings”
Thanks so much for this – this was exactly what I needed. Thanks for putting this up here. So much easier than trawling through Microsoft docs, which are often out of date!
Is there any way to get back those Notes being archived as the Notes folder on online archive does not shows up via Outlook on the web!
I’ve figured out now – just pin the Folders app with Outlook app and move archived items back to the Notes folder.
Hello James
Can you please tell me how you were able o see the note folder in online archive. I am only using OWA. Thank you