Your organization doesn’t have to pay big bucks to set up an on-premises email server. If you’re not looking for all the bells and whistles of the big names, like Exchange, your needs could probably be met by hMailServer.
hMailServer is a free and open-source email server with POP3, IMAP, and SMTP support. That means you can use a variety of email clients to connect to hMailServer. And this post will show you how to install and configure hMailServer. Ultimately, you’ll have a functioning email server in your network.
Table of Contents
Prerequisites
- A Windows Server to install hMailServer. This tutorial uses Windows Server 2019.
- Download the hMailServer installer file.
- DNS Records that resolve to your server. This server will have the following internal and external DNS records:
| Record Type | FQDN |
|---|---|
| A | mail001.o365things.ml |
| MX | mail001.o365things.ml |
Install hMailServer
The installation is simple and self-contained. It follows the wizard-type installation process, so it should be familiar to most Windows users. Let’s begin.
- hMailServer requires .NET Framework 2.0 features specifically, which is included in the .NET Framework 3.5. Run the below command in PowerShell as admin to install it:
DISM /Online /Enable-Feature /FeatureName:NetFx3 /All
- Locate the hMailServer installer and open it.
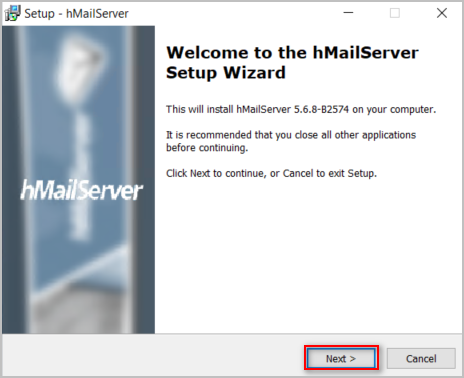
- Click Next on the Welcome page.
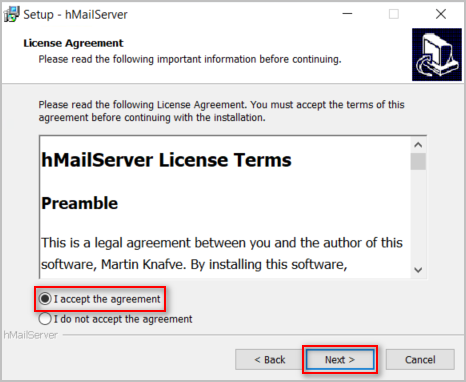
- Accept the license terms and click Next.
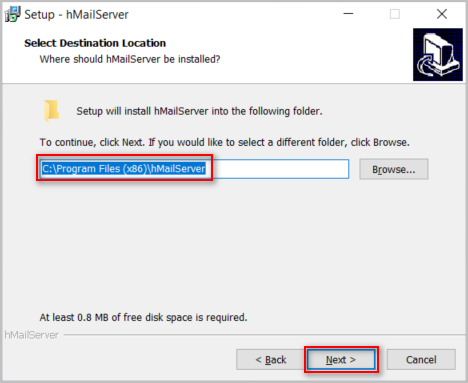
- Specify the installation path or leave the default, and click Next.
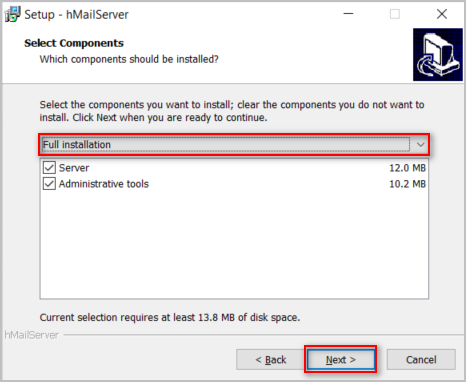
- Since we’re installing the server and admin tools components, select Full Installation and click Next.
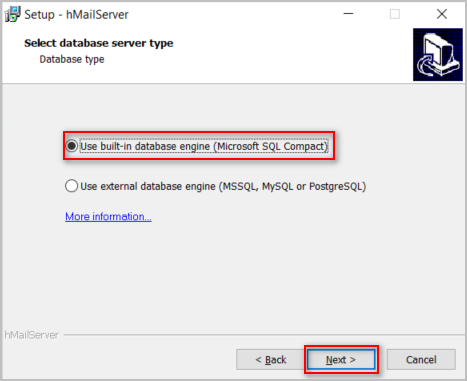
- hMailServer can use external database engines, such as MSSQL, MySQL, or PostgreSQL. But for this tutorial, we’ll choose the built-in database engine (Microsoft SQL Compact). Click Next.
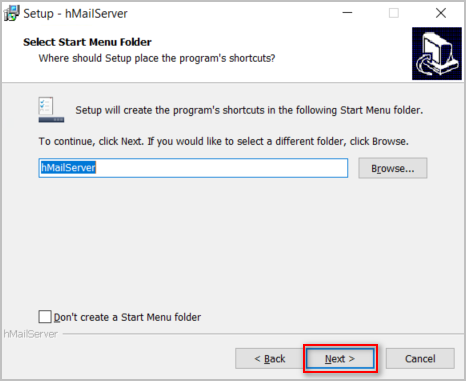
- Leave the Start Menu Folder selection and click Next.
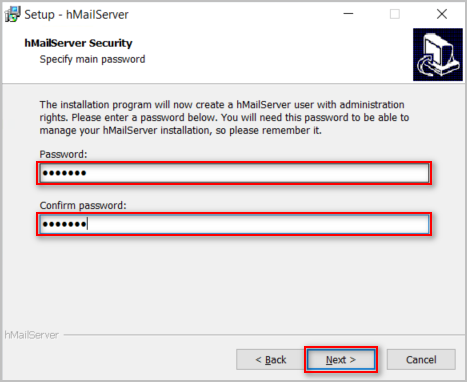
- HMailServer will create an administrator account. Enter the password you want to assign to it and click Next.
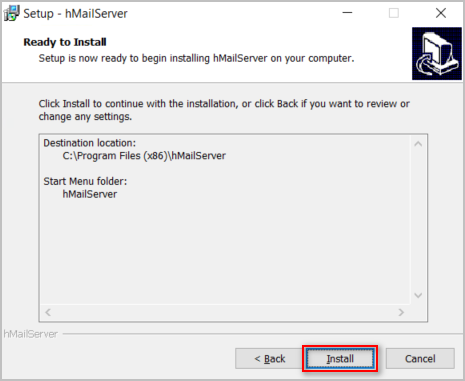
- Click Install.
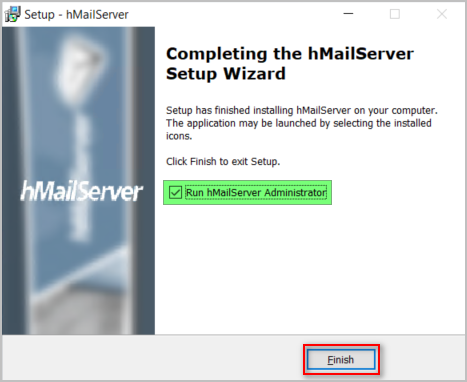
- Once the installation is complete, click Finish.
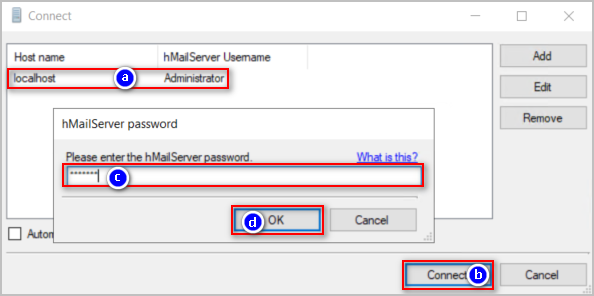
- The hMailServer administrator window automatically shows up. Click the server on the list and click Connect. Enter the password at the prompt and click OK.
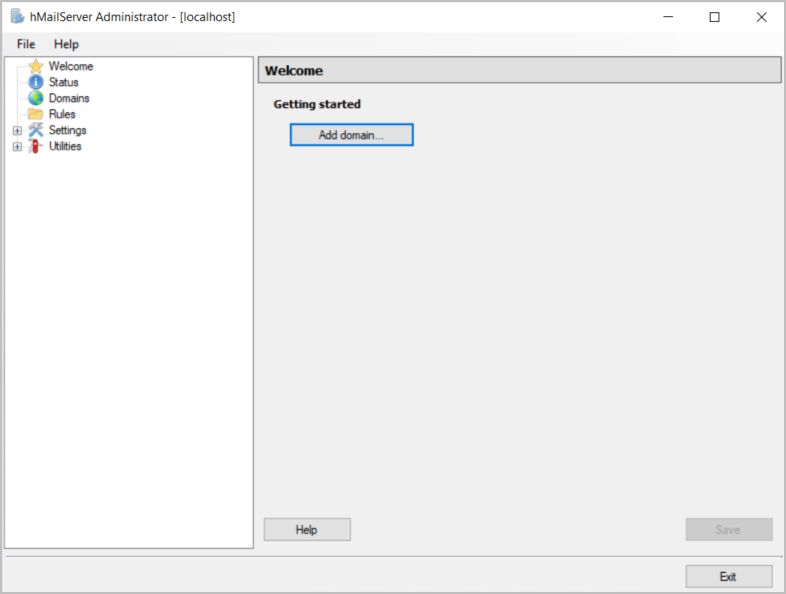
And you’re now logged in to the hMailServer Admin.
Adding an Email Domain
After completing the hMailServer setup, the next step is to add a new email domain. At this point, you should already have a domain name picked out.
- Click Domains > Add.
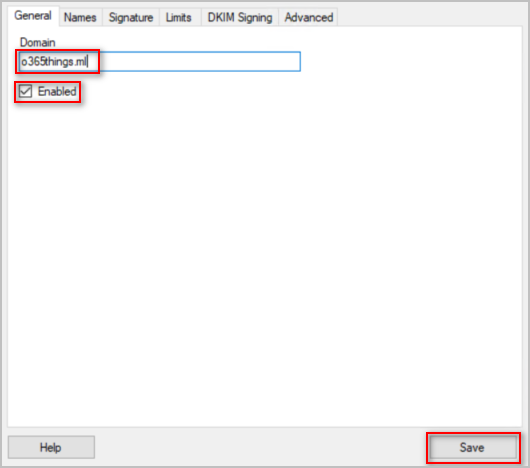
- Type the Domain name, check the Enabled box, and click Save.
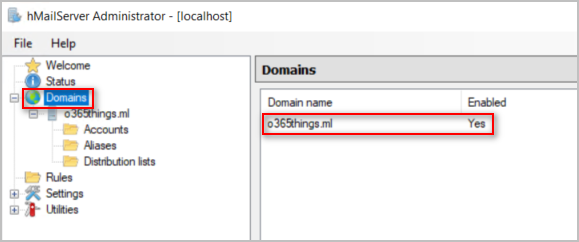
- Click the Domains node to confirm that the new domain is on the list.
Adding New Users
Now that you’ve added the domain, let’s add new users to it.
- Click the Accounts folder under the domain and click Add.
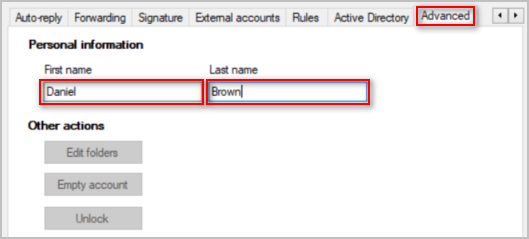
- Click the Advanced tab and enter the new user’s first name and last name.
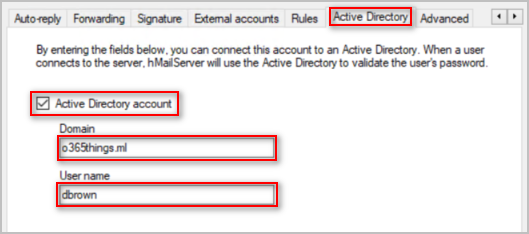
- If you want this user to authenticate using their Active Directory account, click the Active Directory tab, check the Active Directory account box, and enter the AD user’s Domain and User name.
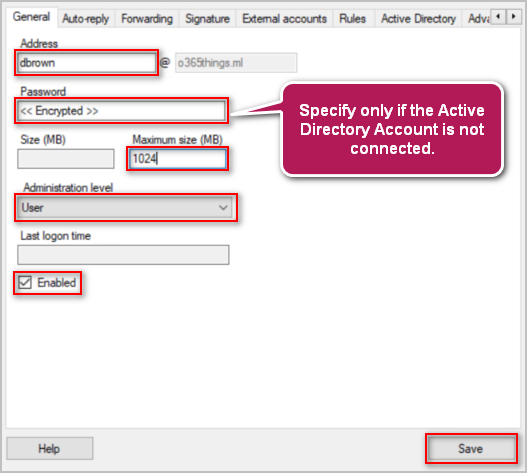
- Under the General tab, configure the following:
- Enter the local part of the email address.
- If you did not connect this to the Active Directory account, enter the password for this new mailbox.
- Set the maximum mailbox size in MB. This example sets the maximum size to 1024MB.
- Select the administration level. The options as User, Domain, and Server. This mailbox user will not have any admin roles, so let’s select User.
- Check the Enabled box. This ensures that the mailbox account will be created in an enabled state.
- Click Save to create the new hMailServer mailbox.
- Repeat the steps to create a new mailbox as needed.
Connect to HMailServer (Unencrypted)
The email domain and mailbox have been created, and we can now use our email client to connect. Depending on your email client, the process will be different. In this example, we’re using Mozilla Thunderbird to connect to hMailServer.
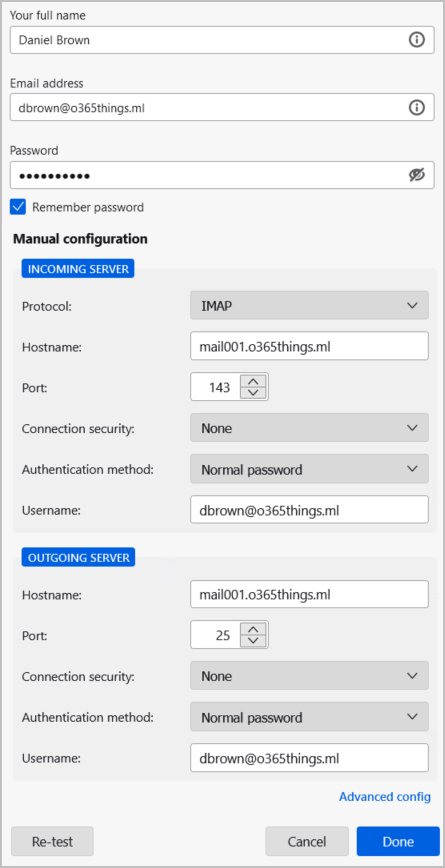
Open the email client and configure the server settings like so:
- Specify the user’s full name.
- Specify the user’s email address.
- Enter the user’s password.
- Incoming server hostname: your server’s FQDN
- Incoming server protocol: IMAP or POP3
- Incoming server port: 143 (IMAP) or 110 (POP3)
- Outgoing server hostname: your server’s FQDN
- Outgoing server port: 25
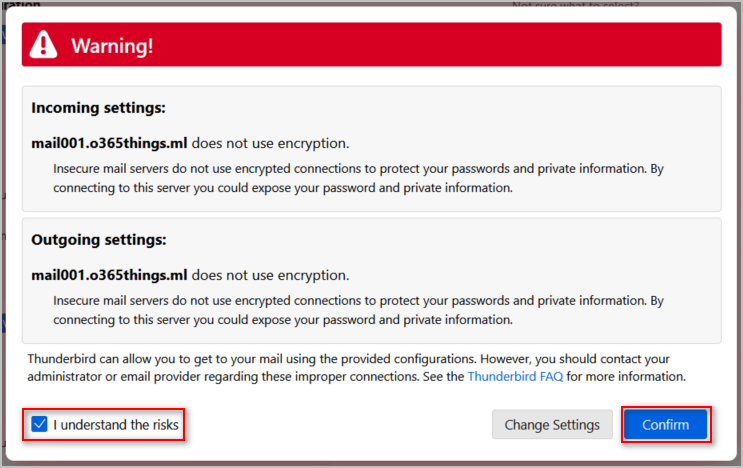
Your email client may warn you that the connection to the server is not encrypted. This is expected because we haven’t configured encryption yet. For now, click I understand the risks and click Confirm.
The email client is now connected to the hMailServer mailbox.
Securing Connections with SSL Certificate
As you’ve seen in the previous section, connection to hMailServer is not encrypted out of the box. To enable encryption, you must first have an SSL certificate and key. These certificate files must be in PEM format that you can get from a third party or self-signed.
Import the SSL Certificate and Private Key
Assuming you have the SSL certificate and key file, navigate to Settings > Advanced > SSL certificates and click Add.
Enter the certificate name, browse for the certificate and private key files, and click Save.
You’ll see the new certificate added to the SSL certificates list if everything is in order.
Create New Secure Protocol Bindings
This time, let’s add new protocol port binding where we’ll assign the SSL certificate for encryption.
Navigate to Settings > Advanced > TCP/IP ports.
Create new port bindings based on the following table.
| Protocol | TCP/IP Port | Connection Security | SSL Certificate |
|---|---|---|---|
| POP3 | 995 | SSL/TLS | |
| IMAP | 993 | SSL/TLS | |
| SMTP | 465 | SSL/TLS |
Each new binding would look similar to the following screenshots.
Reconfigure your email account to connect to the new ports on the hMailServer, similar to the screenshot below.
And your hMailServer connection is now secure.
Configure Outgoing Mail
In most cases, your hMailServer will not be delivering messages directly to the internet recipients. Instead, a perimeter SMTP server would handle all outbound email delivery, also known as a smart host.
Navigate to Settings > Protocols > SMTP and click the Delivery of e-mail tab. Configure the following settings as follows:
- Local host name: the hMailServer FQDN (mail001.or36things.ml)
- Remote host name: smtp.sendgrid.net
- Remote TCP/IP Port: 465
- Server requires authentication: Yes (username and password)
- Connection security: SSL/TLS
Click Save for the changes to take effect.
To confirm whether external email delivery works, send a test email to an external address.
The image below shows that the external recipient received the message.
Conclusion
hMailServer is a powerful, free, open-source email server software that is easy to install and configure. It provides users with a range of features that make email management a breeze, including spam protection, email forwarding, and customizable rules.
In this guide, we have outlined the steps to install and configure hMailServer on a Windows machine. We have also shown how to create email accounts, set up domains, and enable SSL encryption.
While hMailServer is an excellent choice for small and medium-sized businesses or personal email management, it may not be suitable for large organizations with complex email requirements.
Overall, hMailServer is a robust and user-friendly email server solution that can be customized to meet your email management needs. With this guide, you can get started with hMailServer quickly and enjoy secure and efficient email communication.

 And you’re now logged in to the hMailServer Admin.