Modern Windows 10 and 11 versions have plenty of various hotkeys that automate tasks and allow doing things much faster. However, for some reason, there is no hotkey for switching audio devices. Instead, customers need to use the Settings app and the outdated Control Panel.
Fortunately, third-party apps can save the day. If you switch between different audio devices frequently, creating a dedicated hotkey will make your life much easier. There are several ways to change audio devices with a hotkey in Windows 10 and 11, and this article will list the most convenient ones.
Note. Although we use Windows 10 and 11, the most recent and the only supported versions, this guide also applies to Windows 7.
Table of Contents
How to Switch Audio Devices in Windows 10/11?
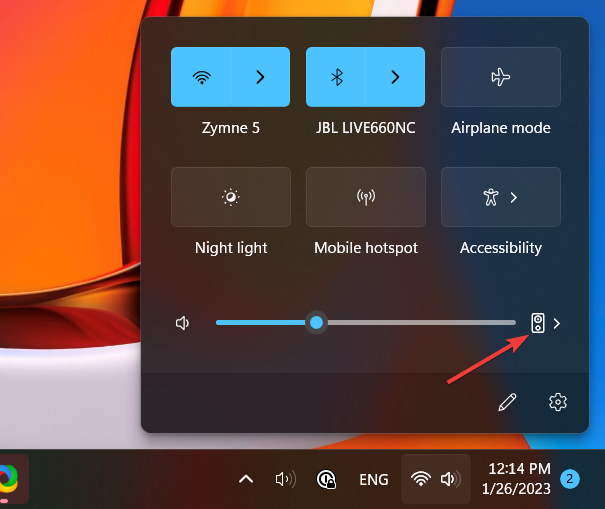
Before we dig deeper into creating an audio device switch hotkey in Windows 10 and 11, let us show you how to toggle between audio output devices in Microsoft’s latest operating systems. Here is how you do that in Windows 11:
- Press Win + A or click the network/volume/battery button in the bottom-right corner.
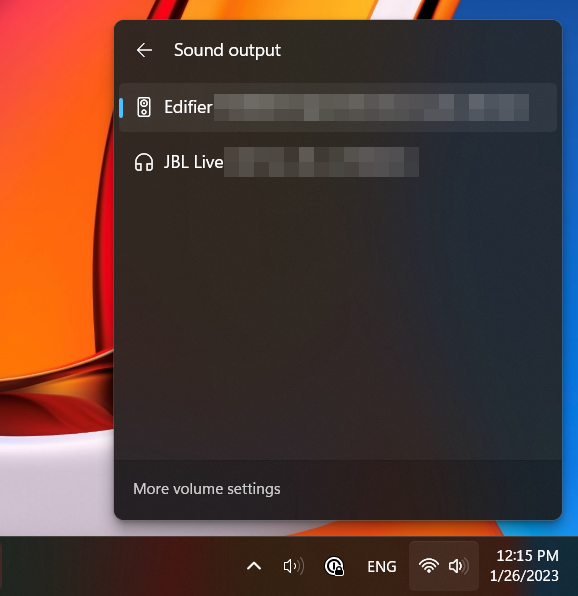
- Click the icon with a speaker next to the volume slider.
- Select the desired audio output device.
You can also take another route:
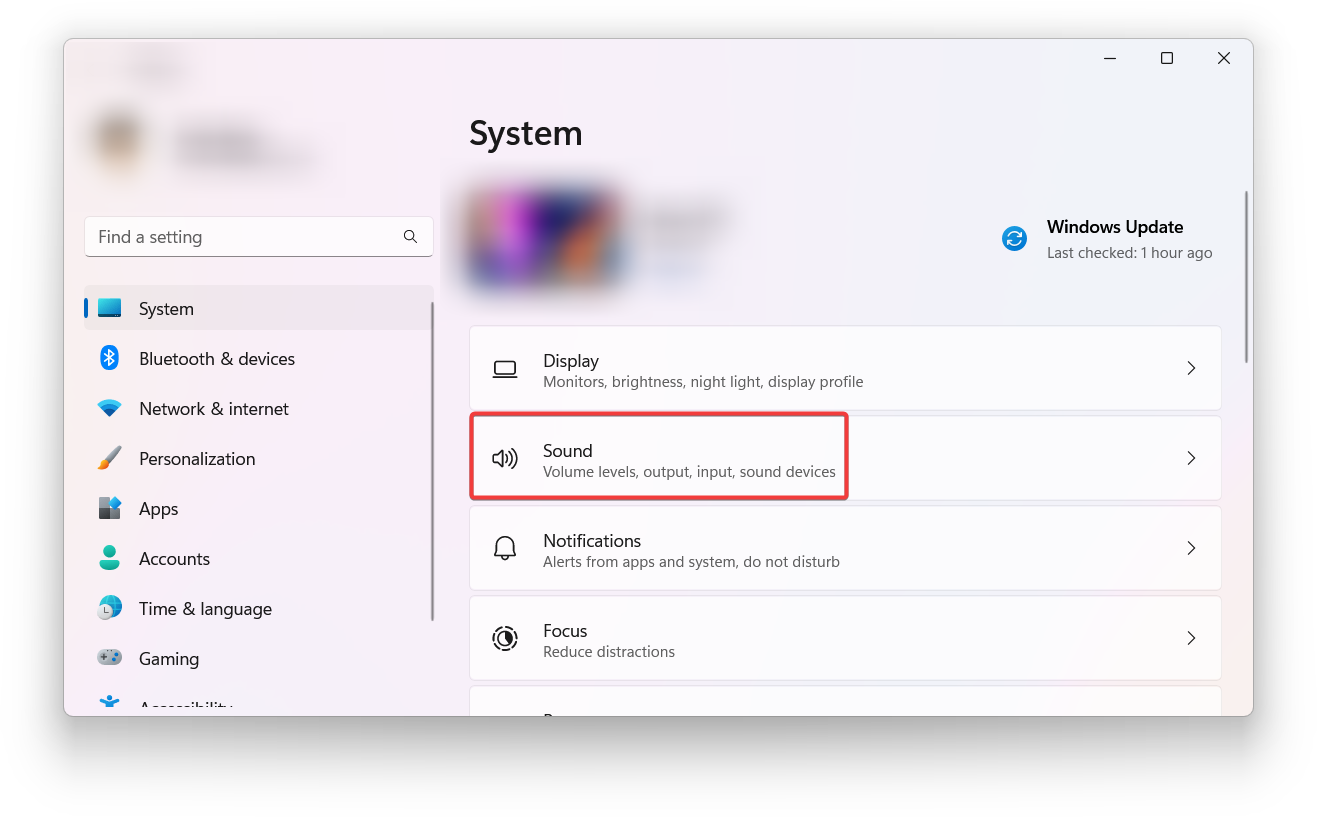
- Open Windows Settings by pressing Win + I and go to the System section.
- Click Sound.
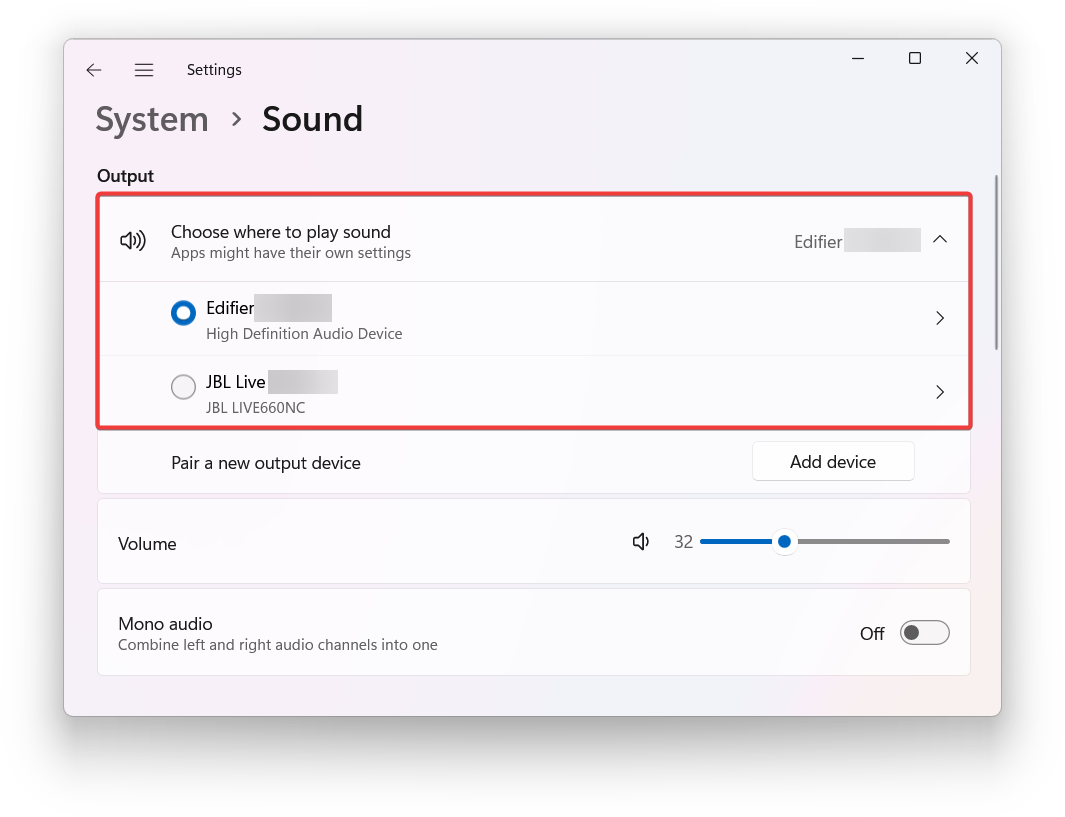
- Select an audio output device from the Choose where to play sound drop-down list.
Finally, you can use the old Control Panel (this will also work in Windows 10, 8.1, 8, and 7):
- Press Win + R and type control.
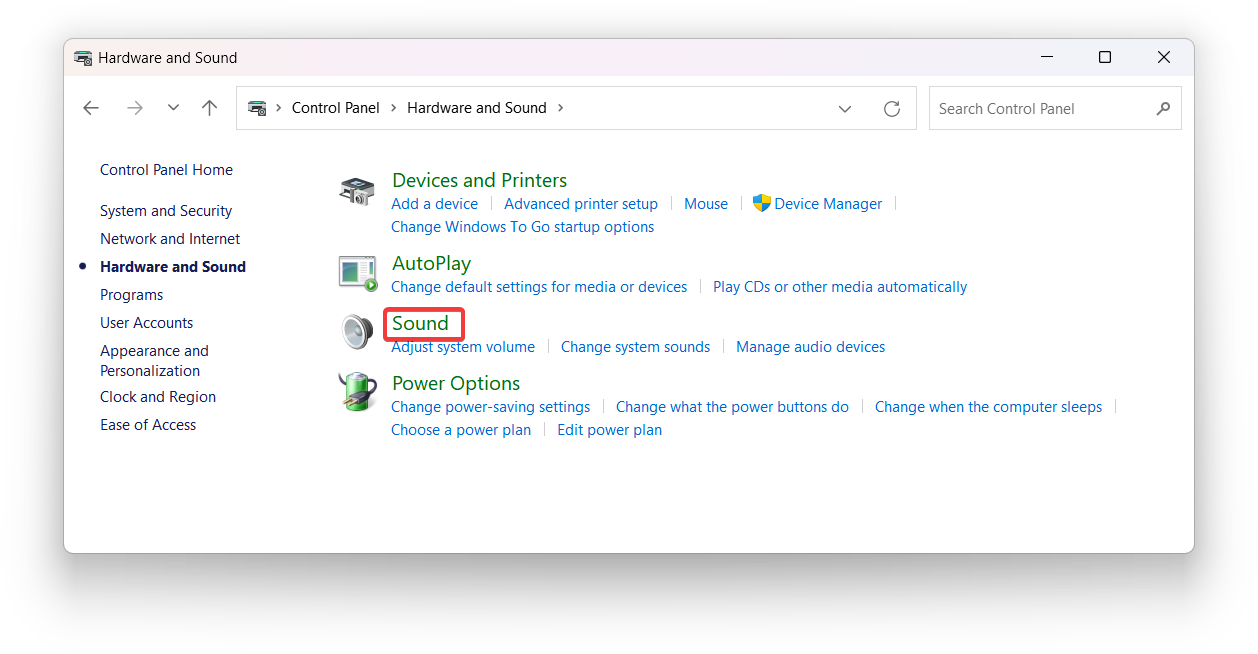
- Navigate to Hardware and Sound > Sound.
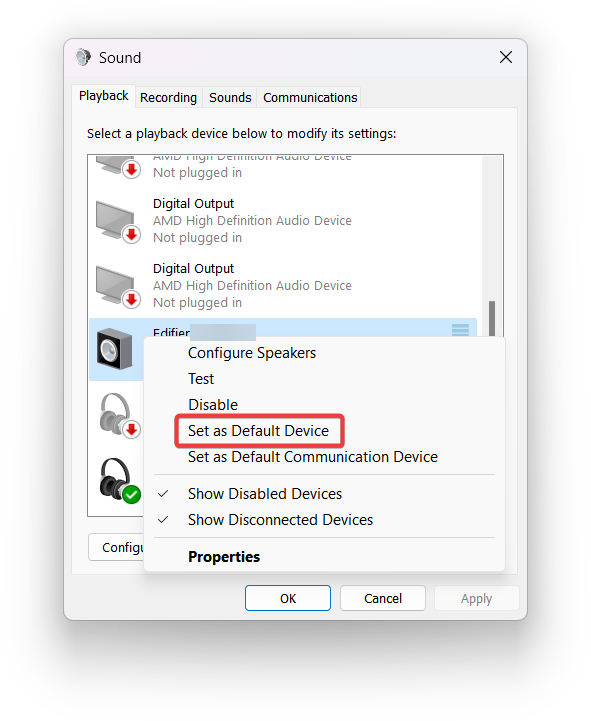
- On the Playback tab, right-click the desired output device and select Set as default Device.
Now let us show you how to create a hotkey or shortcut for audio device switching in Windows 10 and 11.
Change Audio Devices with Hotkey using AutoHotkey
You can create hotkeys for switching audio devices in Windows 10 and 11 using the AutoHotkey app. It is a popular automation tool that lets you create custom shortcuts using different scripts. AutoHotkey app is free; you can download it from the official website.
Note. Learn how to install and configure the Canon ScanGear app.
- Download and install AutoHotkey from the official website.
- Click Install on the first screen. You can leave everything as is and not change the installation properties.
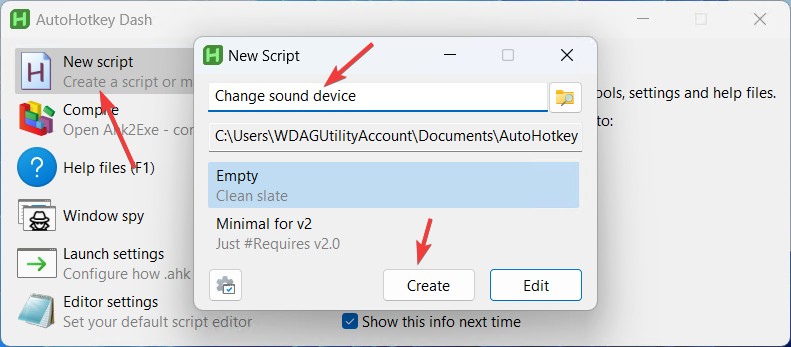
- Click New script and give the file a name. You can keep it in the default location.
- Click Create.
- AutoHotkey will open a new File Explorer window with your script. Open the script in Notepad.
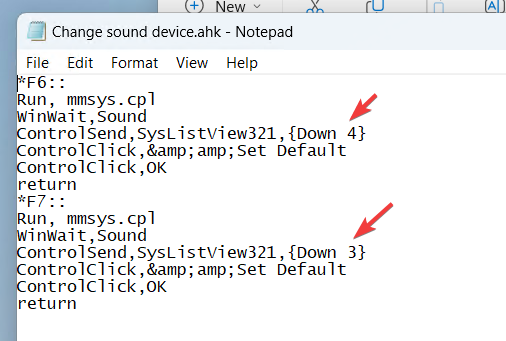
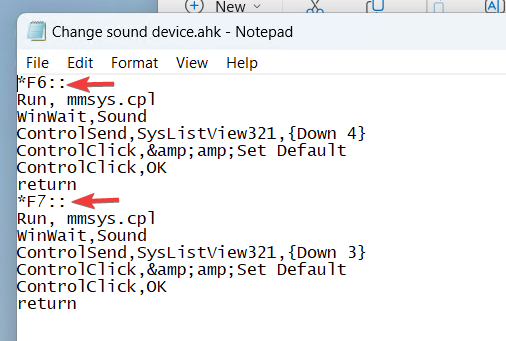
- Copy and paste the following script into Notepad:
*F6:: Run, mmsys.cpl WinWait,Sound ControlSend,SysListView321,{Down 4} ControlClick,&Set Default ControlClick,OK return *F7:: Run, mmsys.cpl WinWait,Sound ControlSend,SysListView321,{Down 3} ControlClick,&Set Default ControlClick,OK return - Press Win + R and type mmsys.cpl.
- Note the order of your playback devices on the Playback tab. For example, in the screenshot below, the default speakers are seventh on the list. Therefore, change {Down 4} to {Down 7}. The number in the brackets indicates how many times AutoHotkey should click down to select the needed audio output device.
- Note the number of the second audio device and change its {Down} value in the second part of the script accordingly.
- Another thing worth noting is that the script above assigns one output device to the F6 key and another to the F7 key. Replace F6 and F7 in the script with the keys you want if necessary.
- Save the script and run it. Now you can switch between your audio devices with the F6 and F7 keys.
How to Switch Between Audio Devices in Windows 10 and 11?
AutoHotkey is a powerful app that can do marvels with skilled hands. However, it is also not for inexperienced users who have no time to learn how scripting works. If you need something more user-friendly and intuitive, here are two apps that will make switching audio devices in Windows 10 and 11 a breeze.
- Download the EarTrumpet app from the Microsoft Store. It is a free, open-source app for managing sound on Windows 10 and 11.
- Installing the app will place a new volume indicator in the notification area. You can hide the stock indicator if you use Windows 10. If you use Windows 11, you will have to deal with two volume indicators on the taskbar.
- Right-click EarTrumpet’s icon in the notification area and select the desired audio output device.
Another app is Audio Switcher. It is also free and open source; you can download it from the official website. Unlike EarTrumpet, Audio Switcher lets you manage both playback and recording devices.
- Download Audio Switcher from the official website. If downloading from the official website does not work, use the GitHub page.
- Open the zip archive and extract the AudioSwitcher.exe file to a convenient location. Installation completed!
- Run the executable file. Right-click the AudioSwitcher icon and select Open Preferences.
- Place a checkmark next to the Start when Windows starts option. It will ensure Audio Switcher works whenever your PC is running.
- Place a checkmark next to the Show Default Playback Device icon in tray option.
- Place a checkmark next to the Start minimized option.
- Open the Playback tab and specify which device should be your default audio output.
- Now you can switch between headphones and speakers in just two clicks: right-click the Audio Switcher icon in the notification area and select the desired playback device from the pop-up list.
Now here is how to assign shortcut keys for switching audio devices in the Audio Switcher app:
- Go to the Playback tab and right-click the audio device.
- Select Set Hot Key.
- Click Hot Key and type the necessary shortcut or a single key. Make sure you use available shortcuts to avoid conflicts with other features and apps.
- Click Save.
And that is how you change audio devices in Windows 10 and 11 with shortcut keys.




1 comment
Don’t do any of this and do Windows Control V and you’re done.