Windows 10 and 11 use the lock screen to display date/time and notifications from apps when your computer is not in use or when you lock it. Dismissing the lock screen prompts users to type their PIN or password, authenticate with a security key, or use biometric authentication. The lock screen is a standard security gate that keeps your system from unauthorized access, so every user needs to know how to configure the lock screen in Windows 10 and 11. Although the two operating systems differ significantly in terms of visuals, the lock screen-related features are the same. Therefore, this article applies to both Windows 10 and 11.
Tip. Did you know that the lock screen is a separate application? Windows keeps it in C:\Windows\SystemApps\Microsfot.LockApp_cw5n1h2txyewy. Removing the folder will also disable the lock screen, but we strongly recommend not doing that. If you want to know how to disable the lock screen in Windows 10 or 11 without wrecking your system, keep reading this article.
Table of Contents
How to Set a Lock Screen Password in Windows 10 and 11?
- Launch the Settings app by right-clicking the Start menu button and selecting Settings. You can also press Win + I or use the All apps list.
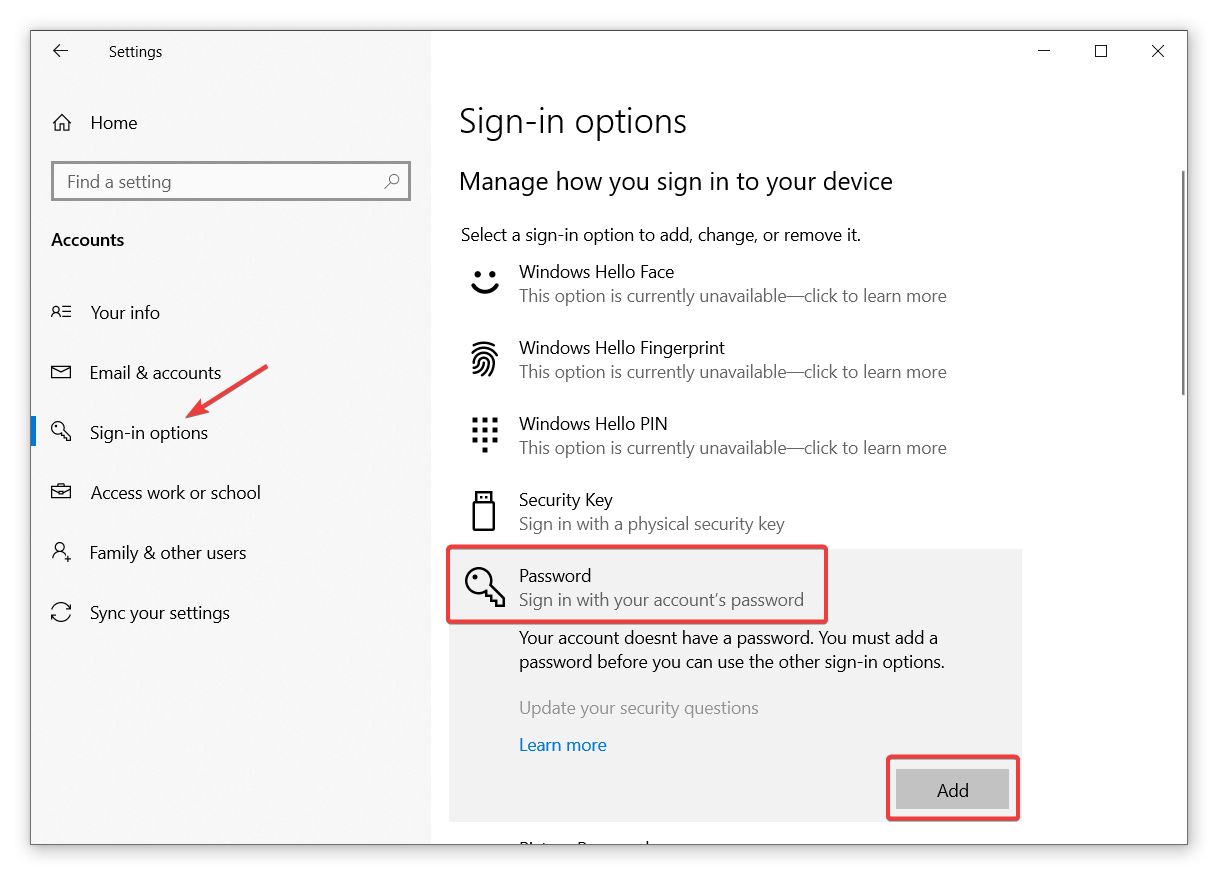
- Go to Settings > Accounts > Sign-in options.
- Click Password and select Add.
- If you use Microsoft Account to sign into your computer, Windows 10 and 11 will automatically assign your Microsoft Account password as the lock screen password. Still, you can use other options, such as Windows Hello or a PIN code.
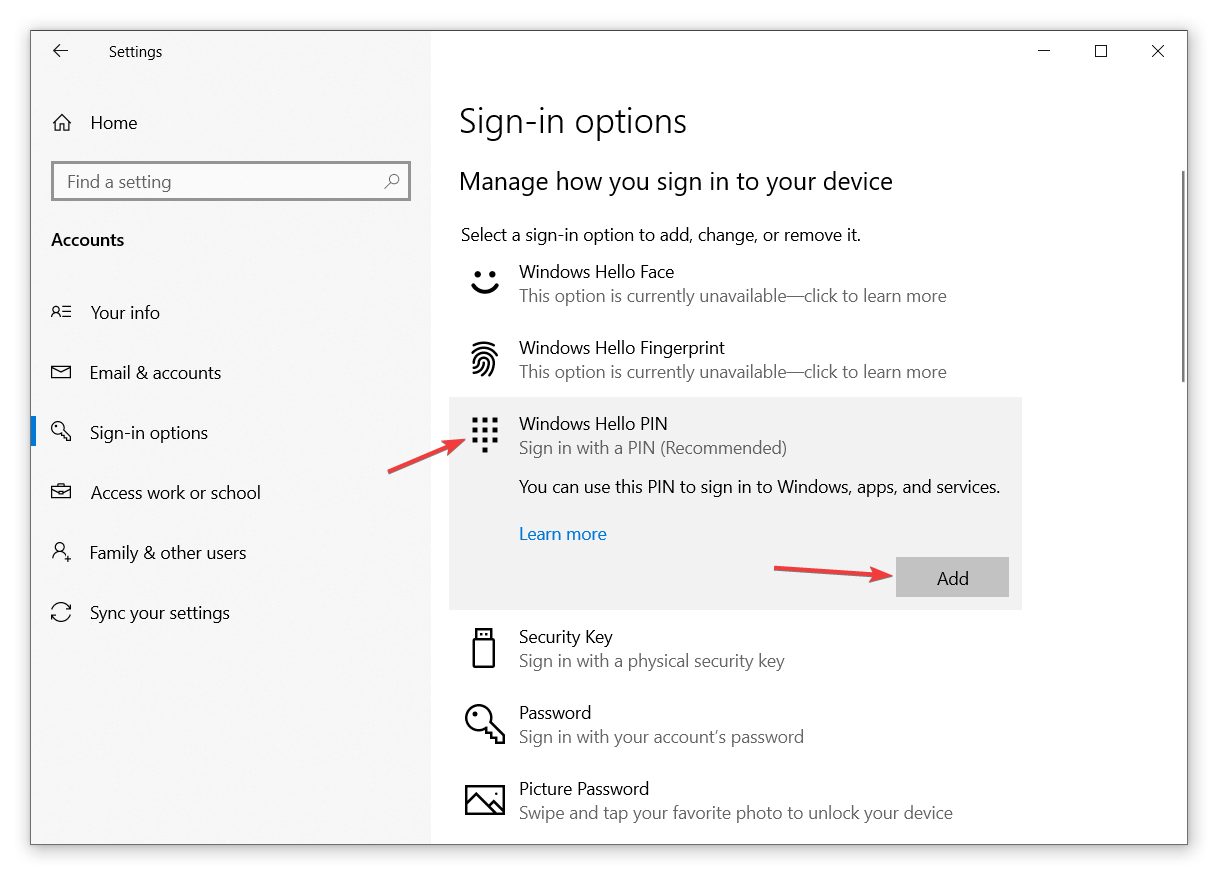
- Once the password is set, try adding a PIN (a simpler four or six-digit combination) or leave everything as is.
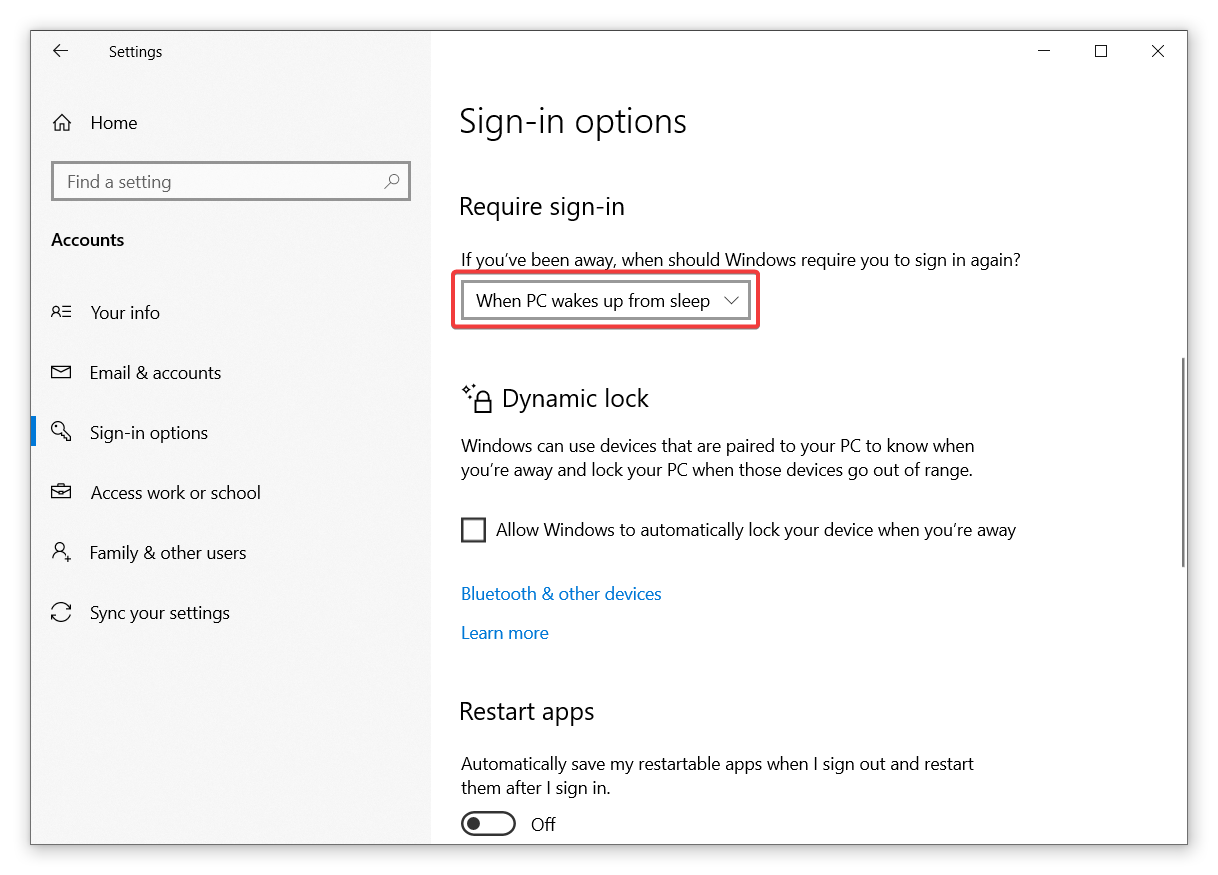
That is how you set a lock screen password in Windows 10 and 11. However, there is one important thing left to mention. Ensure you have the Require sign-in option set to When PC wakes up from sleep. It will protect your system when someone wakes your computer from sleep.
What is Windows Dynamic Lock, and how to set it up?
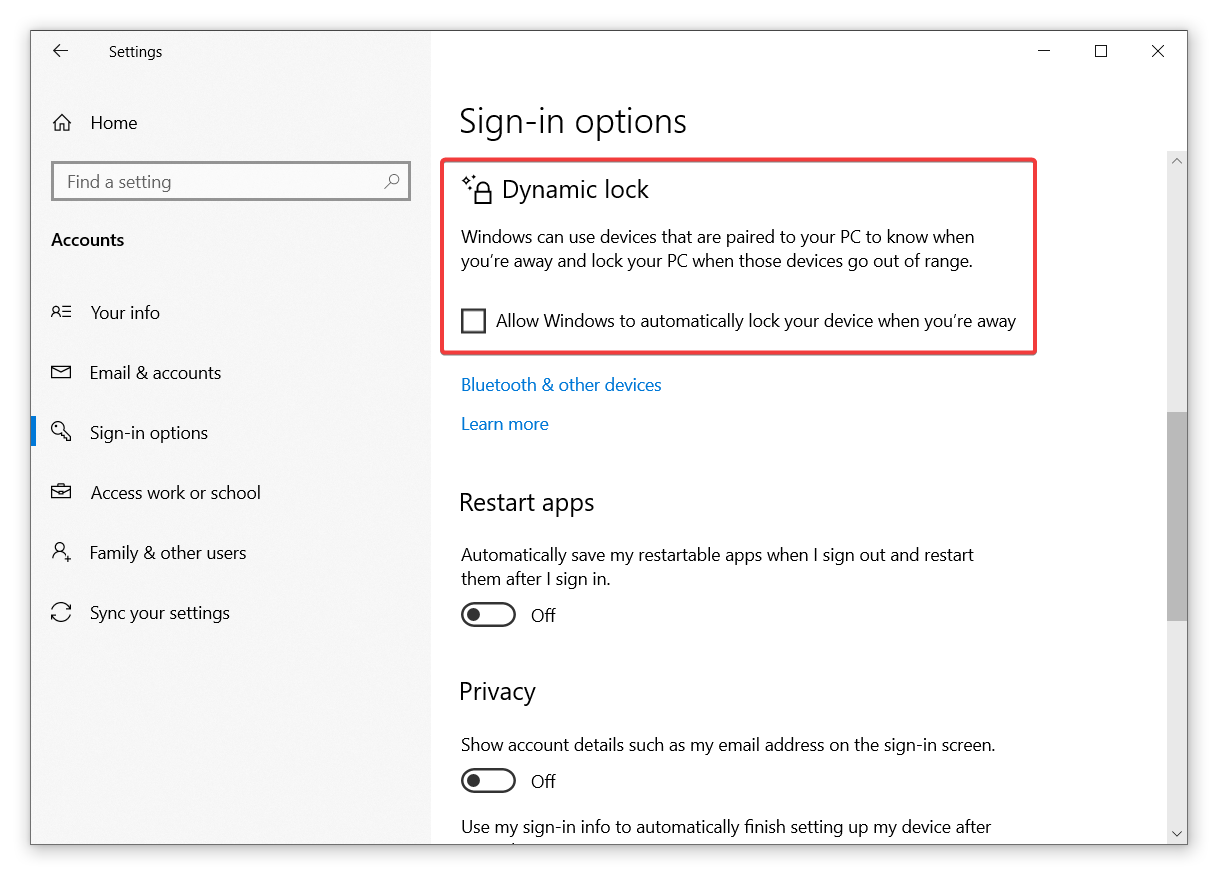
Windows 10 1703 and newer, including Windows 11, have an interesting feature called Dynamic Lock. It uses a Bluetooth connection with your phone to determine when you leave your table. Once detected, Windows automatically locks itself, preventing unauthorized access to your computer. It is a great feature that combines security with convenience and gives peace of mind to your workplace. More importantly, it supports both Android and iOS.
Note. Dynamic Lock in Windows 10 and 11 requires a Bluetooth connection.
- Go to Bluetooth settings and pair your smartphone with your computer.
- Go to Settings > Accounts > Sign-in options and place a checkmark next to the Allow Windows to automatically lock your device when you are away option.
Tip. Windows 10 and 11 have a dedicated shortcut key that lets you lock your computer immediately. You can lock your computer by pressing Win + L. Also, some keyboards have dedicated lock keys, as pictured below (Logitech MX Keys).
How to Change the Lock Screen Background in Windows 10 and 11?
Important. You cannot change the lock screen background in Windows 10 and 11 if your operating system is not activated with a genuine key.
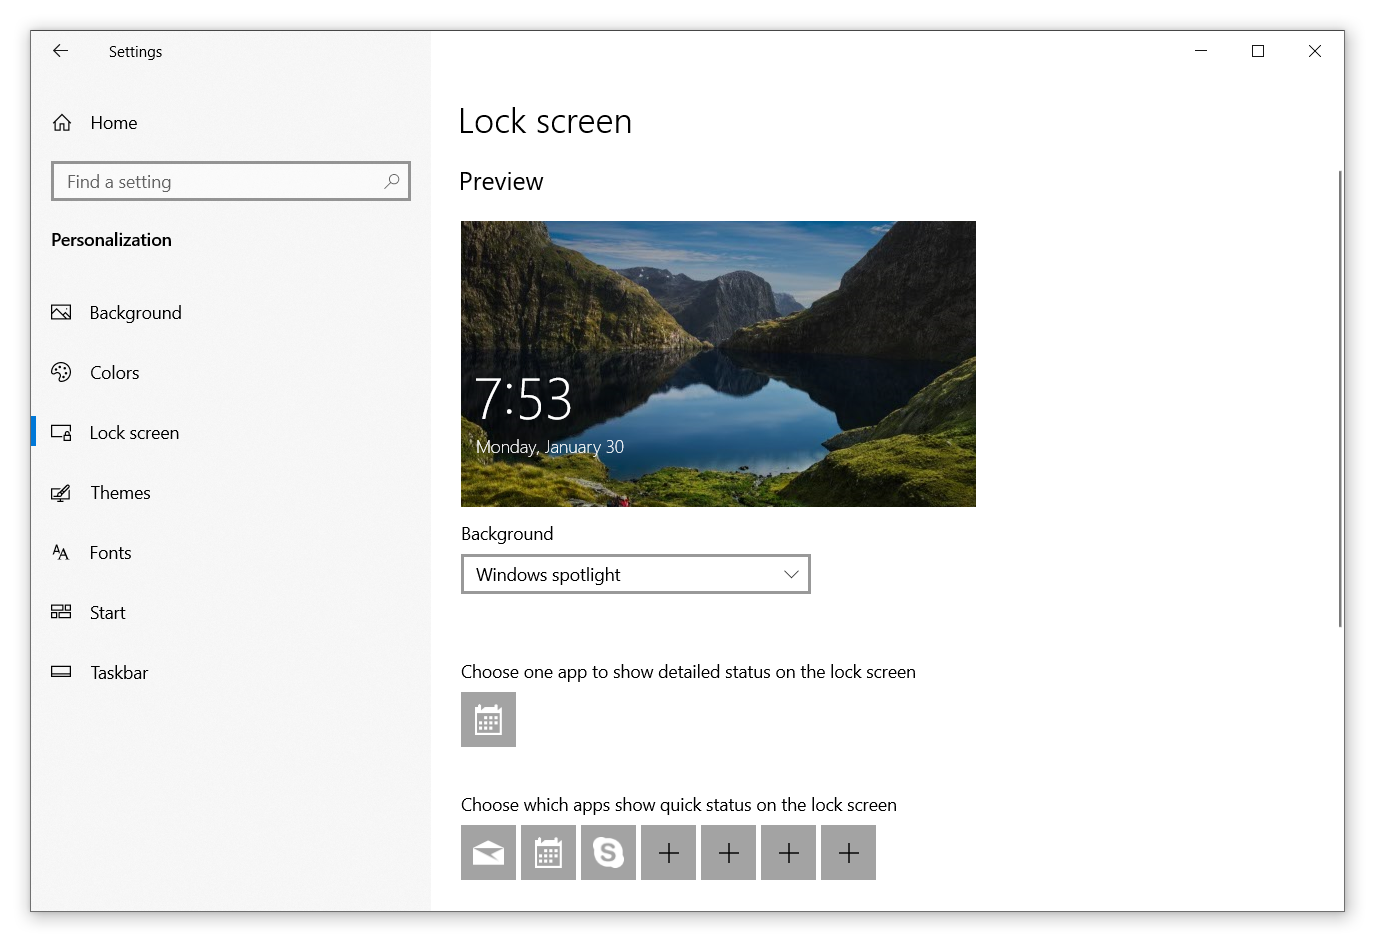
- Press Win + I and go to Personalization > Lock screen.
- Select Picture from the Background drop-down and select an image to use as the Windows 10 lock screen background.
- Also, you can select what apps can details more information on the lock screen. Unfortunately, very few apps can work with Windows 10’s lock screen, and Windows 11 does not support this feature at all. Therefore, you can leave everything as-is.
- If you want to keep the lock screen simpler, use the Show lock screen background picture option to opt for a simpler solid background instead of an image.
Note. Check our article on how to activate your Windows copy on KMS server.
How to Disable Account Email on the Lock Screen in Windows 10 and 11?
Windows 10 and 11 display your account’s email address on the lock screen by default. Many users consider this unnecessary or even harmful since someone can spot your email address and use it to send you spam or even hack you. Therefore, consider disabling the account email on the lock screen in Windows 10 and 11. Here is how.
- Go to Settings > Accounts > Sign-in options.
- Disable the Show account details such as my email address on the sign-in screen.
How to Configure the Screen Turn Off in Windows 10?
Windows 10 and 11 allow you to set timers after which the operating system will disable the screen or put itself to sleep. Disabling the screen does not lock the computer — it will engage the lock screen only after waking up.
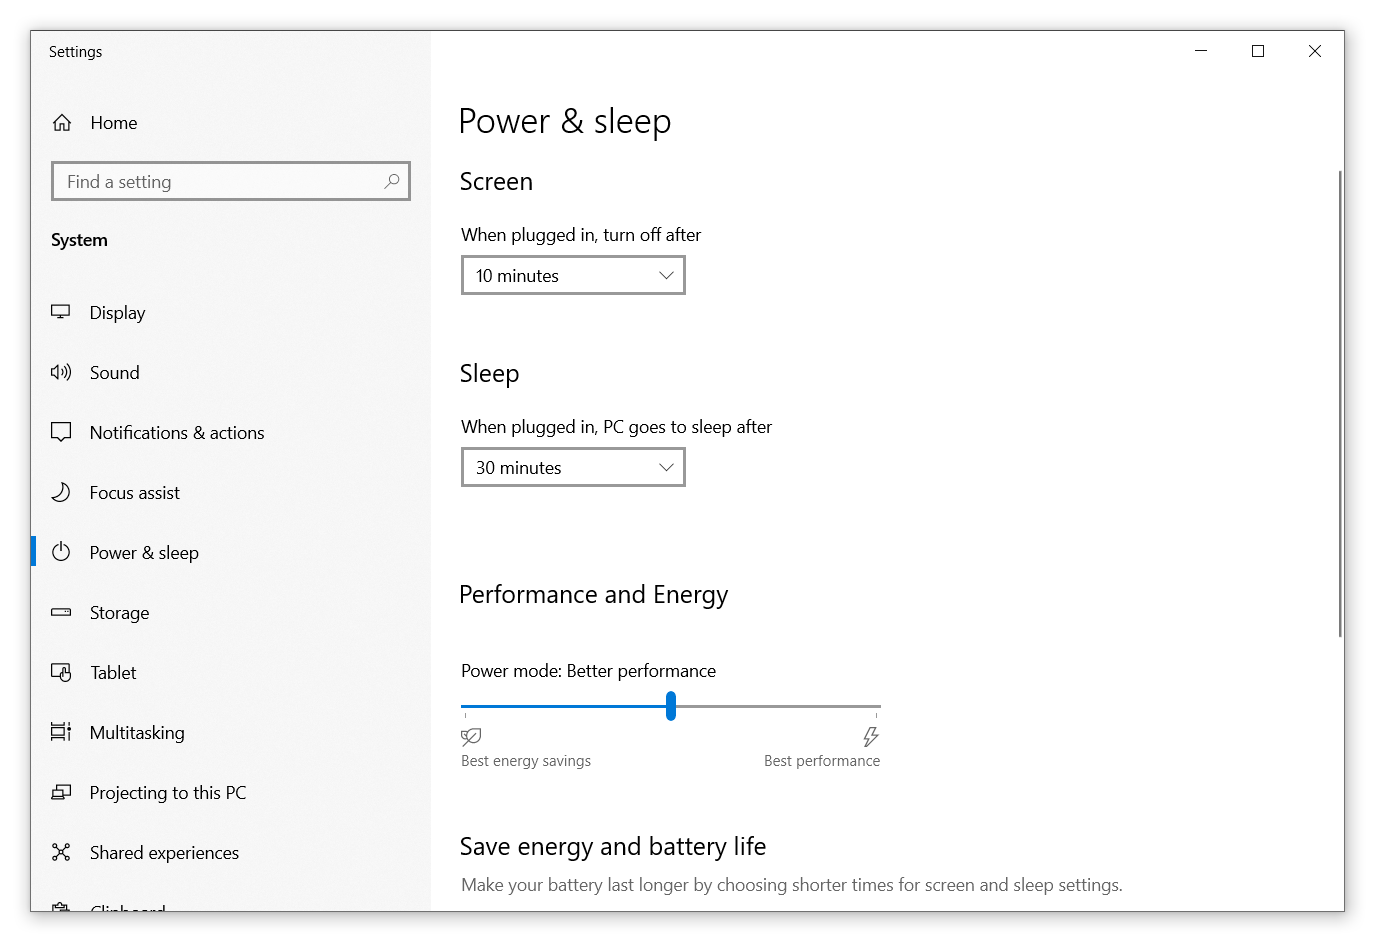
- Right-click the Start menu button and select Power options.
- Find the Screen and Sleep drop-down menus and set the necessary times. If you have a laptop or tablet, Windows 10 will prompt you to set different periods when working on battery and when plugged-in.
How to Lock Computer on Screen Saver in Windows 10?
If you use screen savers, you can set Windows 10 and 11 to automatically lock your computer when someone shakes the mouse or presses a key on the keyboard.
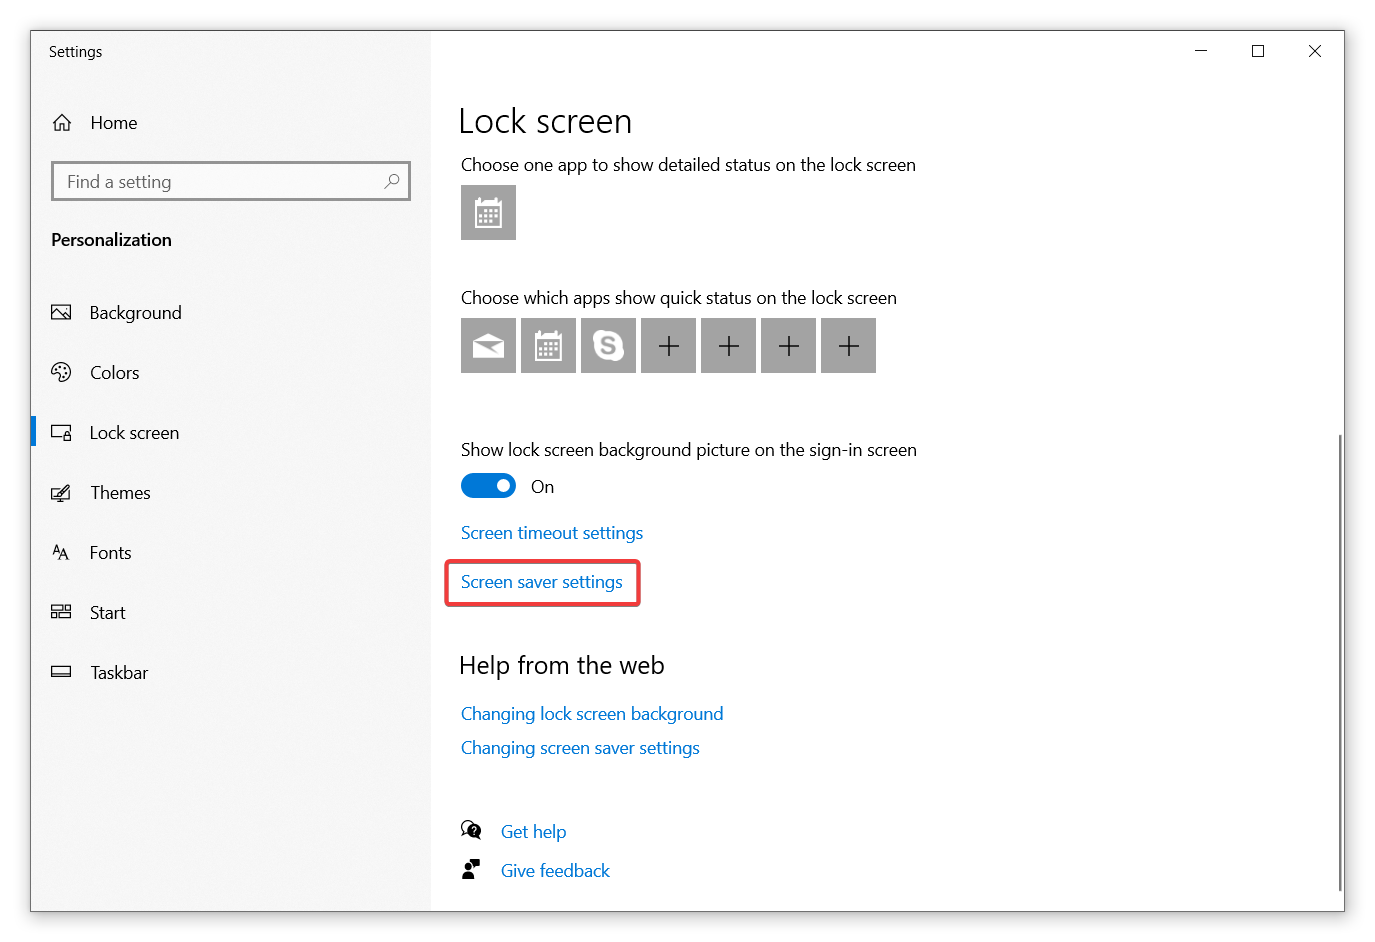
- Go to the Settings app and open Personalization > Lock screen.
- Scroll down and click Screen Saver.
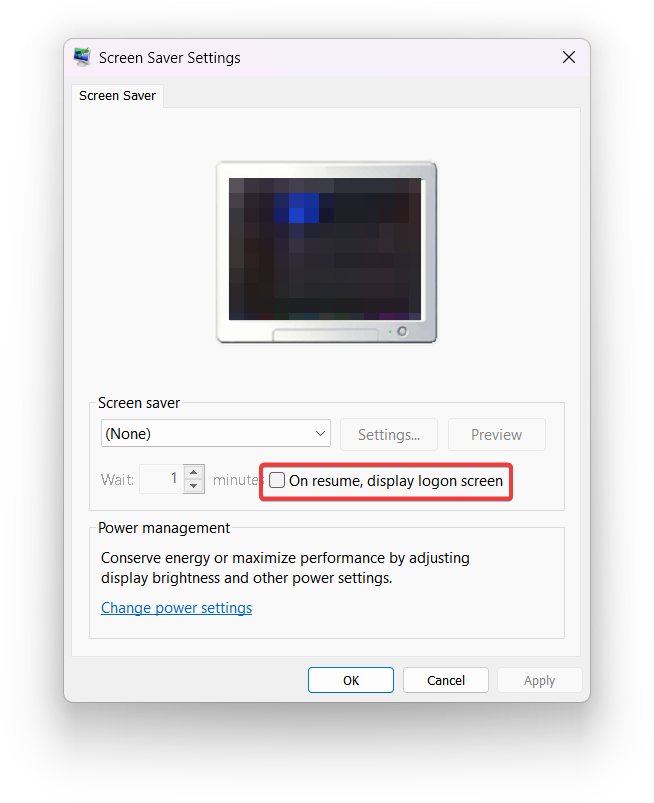
- Select the timeout in the Wait box.
- Place a checkmark next to the On resume, display logon screen.
- Click OK.
How to Disable Lock Screen in Windows 10 and 11?
There are scenarios when customers do not need the lock screen at all. Therefore, they need to know how to disable the lock screen in Windows 10 and 11. You can do that using two methods: Group Policy Editor and Registry Editor. The first option works on systems with Windows 10 Professional, and you cannot use it on Windows 10 and 11 Home. Customers of the latter should opt for the second variant involving Registry Editor.
Note. Both methods might place a message inside the Settings app that some settings are managed by your organization. That is okay.
Important. Disable all passwords, PIN, hardware, and biometric authentication before turning off the lock screen in Windows 10 or 11.
If you use Windows 10 or 11 Professional:
- Press Win + R and type gpedit.msc.
- Go to Computer Configuration > Administrative Templates > Control Panel > Personalization.
- Open the Do not display the lock screen rule.
- Set its status to Enabled or Disabled.
- Restart your computer.
If you use Windows 10 or 11 Home:
- Press Win + R and type regedit.
- Paste the following path into the address bar: HKLM\SOFTWARE\Policies\Microsoft\Windows
- Right-click the Windows folder and select New > Key.
- Rename the new key to Personalization.
- Right-click the Personalization key and select New > DWORD (32 bit) value.
- Rename the new value to NoLockScreen.
- Open the value and change its value data to 1. Setting the value to 0 will enable the lock screen once again.
- Restart your computer.
That is how you configure the lock screen in Windows 10 and 11.

