It’s common for homes nowadays to have private home lab hosting services, like a media server or FTP server. In some cases, users would want to make these private services accessible anywhere on the internet.
Not every internet subscription comes with a dedicated public IP address. But even so, configuring your internal network to be accessible publicly is not typically a simple task for most home users.
So what’s the alternative? You should consider using the Cloudflare tunnel, part of the Cloudflare Zero Trust, which exposes your private network to the Cloudflare global network. There are several subscription options to Cloudflare Zero Trust, but the free option should be sufficient for a home lab.
Stay with me, and I will show you how to set up Cloudflare Tunnel and use your private services online!
Table of Contents
Requirements
To follow along, make sure you have these prerequisites.
- A server in your internal network. This server can be any computer that hosts your private services. This demo uses an Ubuntu Server 20.04.
- Docker is installed on your server. Although Cloudflare Tunnel (cloudflared) can run as a standalone service, installing it as a Docker container makes it more convenient and consistent across platforms.
- You must already have a DNS domain in your Cloudflare account. This example will use the DNS domain org870b.ga.
Create a Cloudflare Tunnel
Suppose you already have a Cloudflare account, follow these steps to create a new tunnel.
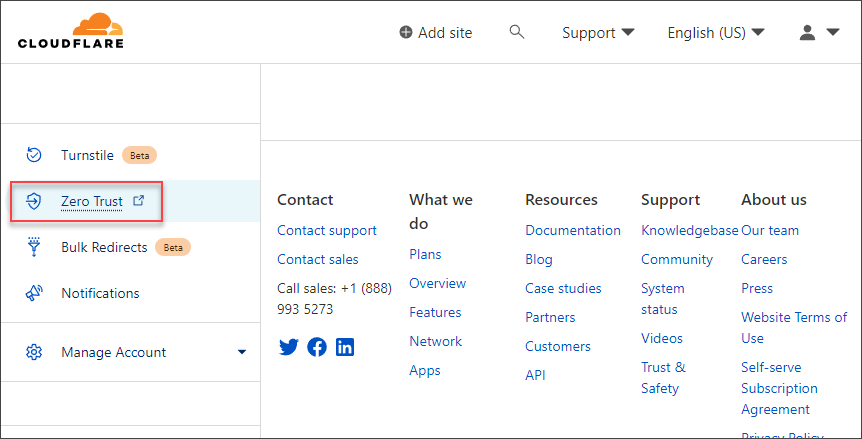
- Login to your Cloudflare account and click on the Zero Trust link.
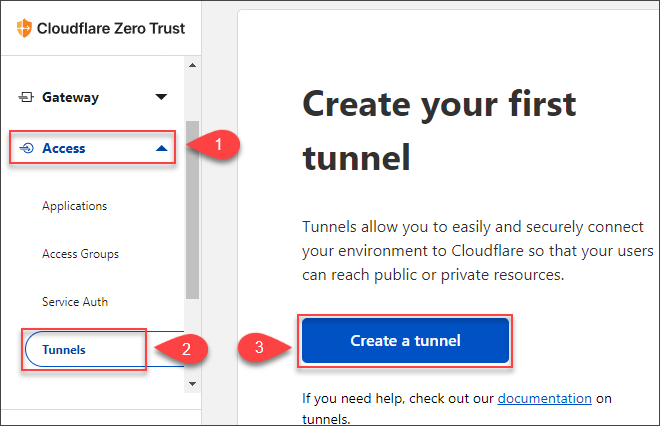
- Click Access → Tunnels → Create a Tunnel.
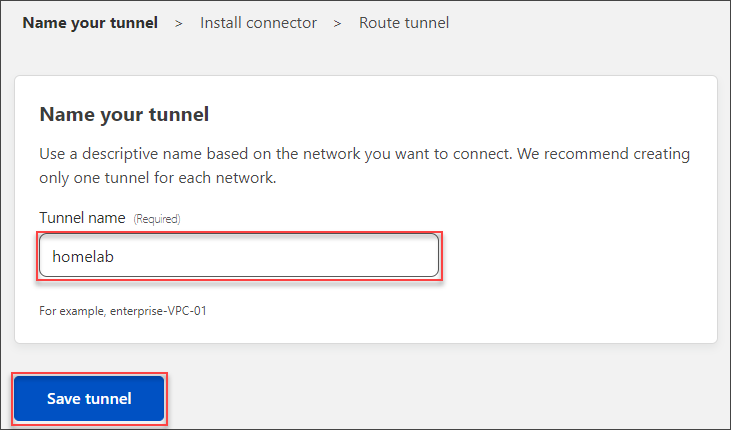
- Next, type a descriptive name for the tunnel you’re creating. In this example, we’ll name the tunnel homelab to indicate that this tunnel we are creating for our home lab network. Once you’ve entered the tunnel name, click Save tunnel.
Install the Cloudflare Tunnel Connector
After saving the new Cloudflare tunnel, the next step requires installing the Cloudflare Tunnel connector on your server.
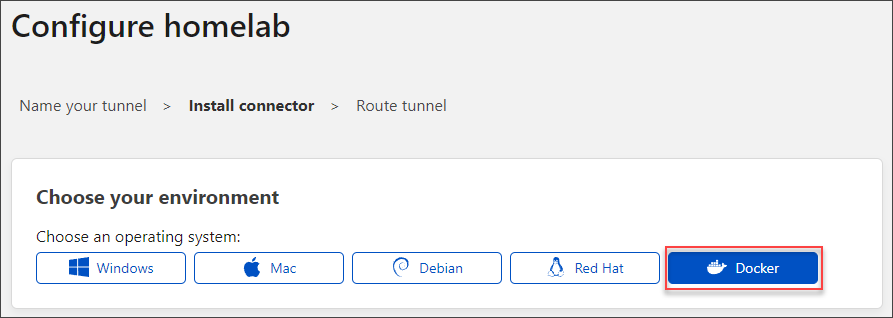
- On the Choose your environment, select the operating system of your server. The connector can be installed on Windows, Mac, Linux, and as a Docker container. In this example, I’ll install the connector as a Docker application.
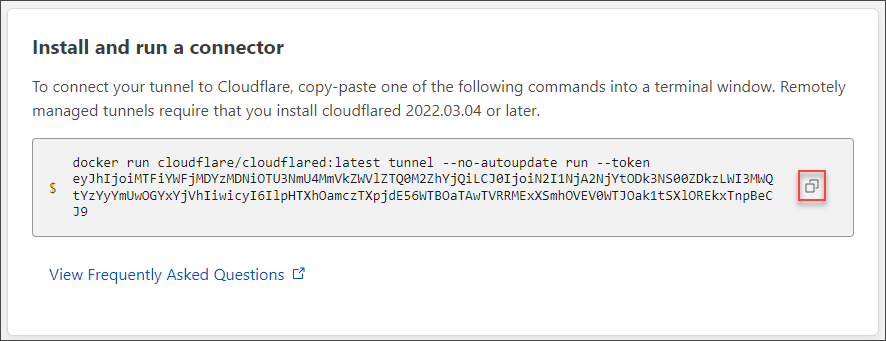
- The instructions or command to install the connector for your chosen environment appears below. In this example, there’s only one command to execute to run the Cloudflare tunnel connector as a Docker container. Copy this command.
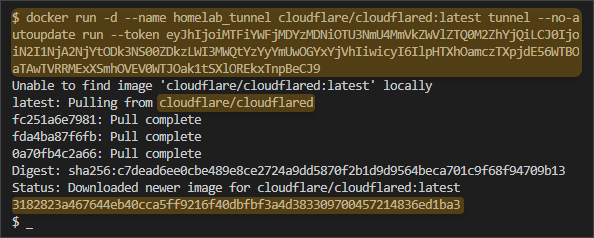
- Before running the docker run command, let’s insert the -d option to run the container in detached mode, and the –name <name> argument to name the container.
- Now, run the command in your server’s terminal. As you can see below, Docker downloads the cloudflare/cloudflared image from the Docker Hub and starts the new container.
- Let’s confirm that the Cloudflare Tunnel container is running.
docker ps -f 'name=homelab_tunnel'
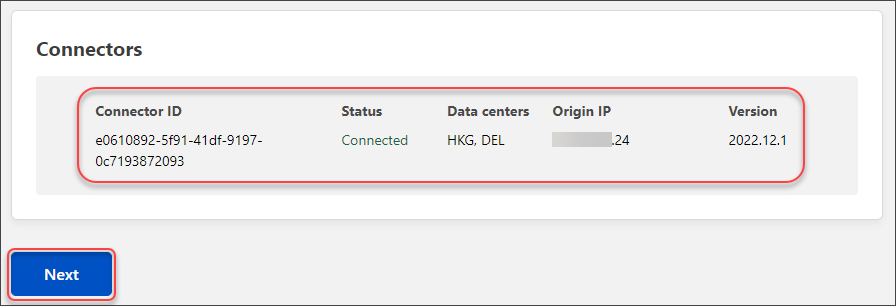
- Go back to your Cloudflare Zero Trust Tunnel page, and you should see that the connector status is not connected. Click Next.
Expose a Web Application Through the Cloudflare Tunnel
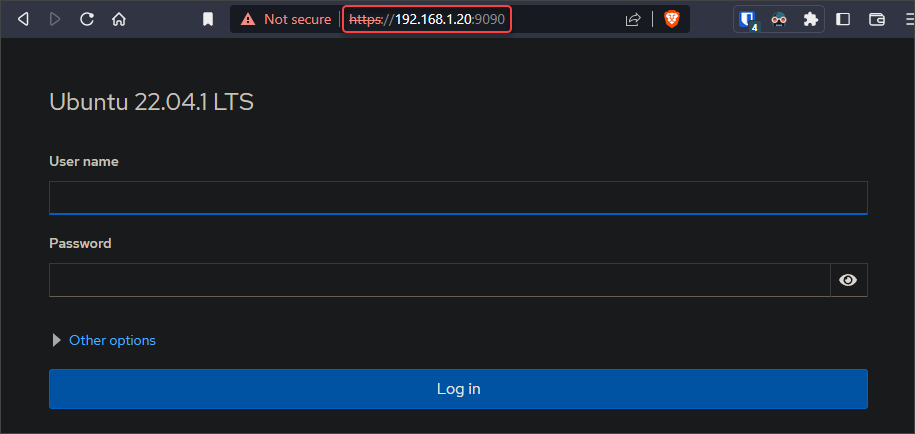
In my home lab setup, Cockpit is installed on my Ubuntu server and accessible on https://192.168.1.20:9090.
Note. How to Install Cockpit on Ubuntu for Web-Based System Management
In this example, let’s expose this web application through the Cloudflare tunnel network and make it accessible to the internet.
- Enter the subdomain that you want to assign to the service. In this example, let’s call it cockpit.
- Choose the domain from the dropdown list.
Note. You must already have a DNS domain configured in Cloudflare DNS for this step. Otherwise, there will be no domain available in the list. - Choose HTTPS from the Type selection.
- Enter the web service URL inside the URL box. This URL is the internal address of the web service, such as 192.168.1.20:9090 for Cockpit.
- Click on Additional application settings.
- Expand TLS and enable the No TLS Verify switch. Lastly, click Save tunnel.
Note. This step is applicable only if the service you’re exposing is using HTTPS and the certificate is not from a public certificate provider.
- At this point, you now have a Cloudflare tunnel:
- Named homelab with one configured route to cokcpit.org870b.ga.
- The tunnel status is Healthy.
- The connector status is Connected.
And a proxied CNAME record pointing to the Cloudflare Argo Tunnel FQDN (<tunnel-id>.cfargotunnel.com>)
- Finally, test whether you can access the web application on the internet by opening the public hostname in a web browser. As you can see below, opening the https://cockpit.org870b.ga URL loads the Cockpit interface of my internal server.
Add a Cloudflare Tunnel SSH Access
Apart from web-based applications, you can also expose non-HTTP services through different protocols. One example is SSH access.
Note. Check our tutorial on how to update Docker image and container to the newest version.
Exposing your server’s SSH access via Cloudflare Tunnel, you only need to create the public hostname in the existing tunnel. No need to open new ports in the firewall.
- First, open your list of tunnels and click configure next to the tunnel name.
- Click the Public Hostname tab and click Add a public hostname.
- Enter the subdomain and select the domain. Choose SSH as the service type, and enter the server’s internal IP address name and port in the URL field.
As you can see below, this example has the following values.- Subdomain+Domain = terminal.org870.ga
- Type = SSH
- URL = 192.168.1.20:22
- Click Save hostname.
- You now have an SSH public hostname added to your Cloudflare Tunnel.
Connect using the Native SSH Client
To connect to the Cloudflare Tunnel SSH endpoint you created, you must first install the cloudflared binary to your client computer.
- Open a browser on your computer and open the Cloudflare Tunnel downloads page at https://developers.cloudflare.com/cloudflare-one/connections/connect-apps/install-and-setup/installation/.
- On the page, download the cloudflared binary for your computer’s operating system. In this example, I’ll download the executable for Windows since I’m using a Windows 11 computer.
- After downloading the file, move it to a convenient directory. In this example, we’ve moved the file to C:\Tools\cloudflared-windows-amd64.exe.
- Next, edit your SSH client configuration. Open the file ~/.ssh/config in your text editor. Append the following configuration entry for your Cloudflare Tunnel SSH public hostname.
- Make sure to replace terminal.org870b.ga with your SSH public hostname and C:\Tools\cloudflared-windows-amd64.exe with your correct executable location.
Host terminal.org870b.ga

ProxyCommand C:\Tools\cloudflared-windows-amd64.exe access ssh --hostname %h
- Save and close the config file.
- Open a terminal (PowerShell on Windows) and run the following command:
ssh <username>@<public-hostname>
Conclusion
Cloudflare Tunnel really changes the game. Imagine hosting many applications inside your home network and then configuring which ones to make available to the internet.
For example, you can host your own password manager instance and make it available even when traveling and not connected to your home network! You can make your media server available online and share it with your family and friends across different locations.





 And a proxied CNAME record pointing to the Cloudflare Argo Tunnel FQDN (<tunnel-id>.cfargotunnel.com>)


3 comments
Hello. Thanks a lot for this useful post.
I am travelling to a country where the internet is under massive censorship (including YouTube, …!!!)
I would like to connect to my home internet and bypass this censorship through Cloudflare. I have a PC at home and I have set up my cloudshare site and tunnel and all seems healthy. The public hostname of this Tunnel uses the IP address of this PC at home with an open port through HTTPS (let’s say 192.168.2.42:8080).
I still cant connect to my home network and I cannot access my router (192.168.1.1).
Do you have any idea how i can resolve this issue?
Does this work if the server is on a network that uses CGNAT?
I have no way to test this right now, but the idea is to simplify publishing internal services to the internet via the tunnel without worrying about the in-between network. So long as the connector is installed on your host and it can reach the ZeroTrust network.