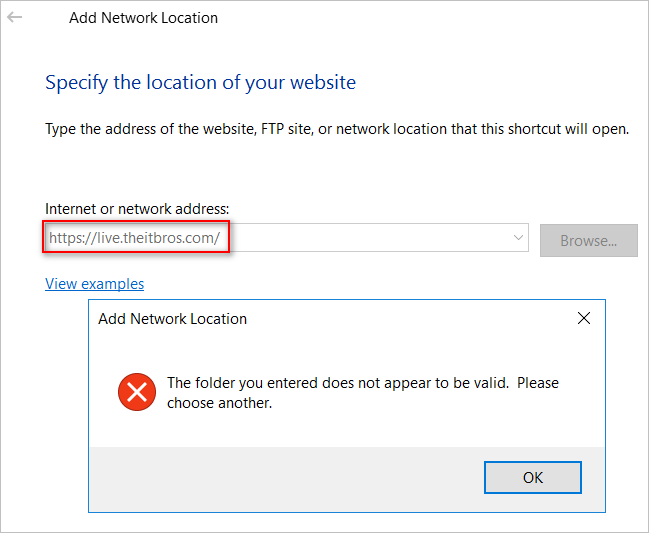
So, you need to mount a WebDAV share to your Windows Server 2016 (or above) and find out that you can’t. Instead, when you try a WebDAV share, you get this error.
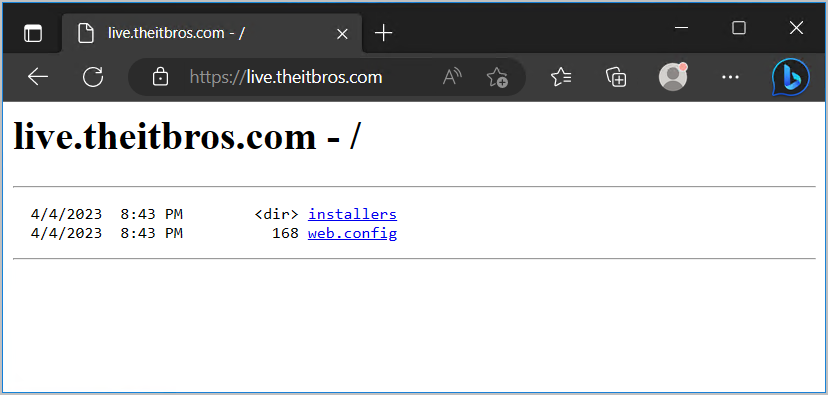
But when you access the same WebDAV site from the browser, you can see it is accessible.
So what gives? Before anything else, let’s discuss a bit about WebDAV.
Table of Contents
What is WebDAV?
WebDAV (Web Distributed Authoring and Versioning) is an HTTP/1.1 protocol extension that allows for the collaborative editing and management of files on remote web servers. It enables users to create, move, copy, and delete files and directories on a web server using a variety of clients, including web browsers and specialized WebDAV clients.
WebDAV provides an alternative to traditional file transfer protocols like FTP (File Transfer Protocol) and SFTP (Secure File Transfer Protocol), offering more advanced features such as locking and versioning. It can be used for various purposes, including collaborative document editing, content management, and remote file storage.
WebDAV operates over HTTP and HTTPS, allowing it to work seamlessly with existing web infrastructures. Many web servers and operating systems support it, and it can be accessed using a wide range of client applications, including popular web browsers like Chrome, Firefox, and Internet Explorer.
Installing the WebDAV Client on Windows Server
The recurring keywords are server and client. You have a WebDAV server, and you can use browsers are clients to access those shares. But accessing the WebDAV share using the browser brings limited features, and the user experience is not seamless. Mapping the WebDAV share a network drive is the more desired method.
But to map the WebDAV share to your computer requires a WebDAV client that isn’t installed on Windows Servers by default. But don’t worry. If you’re using Windows Server 2012 through 2022, installing the WebDAV client is a breeze.
Follow these steps to install the WebDAV-Redirector feature on your Windows Server.
- Log in to your Windows Server and open PowerShell as admin.
- Run any of the following commands to confirm WebDAV-Redirector is not yet installed.
Get-WindowsFeature WebDAV-Redirector
Get-WindowsOptionalFeature -Online -FeatureName WebDAV-Redirector
Dism /Online /Get-FeatureInfo /FeatureName:WebDAV-Redirector
- Run any of the following commands to install the WebDAV-Redirector feature:
Install-WindowsFeature WebDAV-Redirector -Restart

Enable-WindowsOptionalFeature -Online -FeatureName WebDAV-Redirector

Dism /Online /Enable-Feature /FeatureName:WebDAV-Redirector
In this example, we’ll use the first command. It is possible for the server to automatically reboot due to using the -Restart switch.
- After the server restarts, reopen a PowerShell session and run any of the commands in Step 2:
Get-WindowsOptionalFeature -Online -FeatureName WebDAV-Redirector
According to the below screenshot, the WebDAV-Redirector has been installed.
- Once the WebDAV Redirector feature is installed, two services become available on your server:
- WebClient — Enable Windows-based programs to create, access, and modify Internet-based files.
- MRxDAV — File system driver (WebDav Client Redirector Driver).
Let’s confirm that these services are available using the Get-Service cmdlet:Get-Service WebClient,MRxDAV | Format-Table Name,DisplayName,StartType,Status
By default, these services are set to start when an event triggers them manually.
- While the WebClient and MRxDAV services are set to start when an event that requires them is triggered manually, there’s still the possibility of failure. So to make sure these services are running, let’s change the start type to automatic:
"WebClient","MRxDAV" | ForEach-Object {

Set-Service $_ -StartupType Automatic

Start-Service $_

}
Get-Service WebClient,MRxDAV | Format-Table Name,DisplayName,StartType,Status
Note. Learn how to speed up FileZilla FTP transfers.
View the WebClient Service Configuration
The WebClient service is configured through the registry. All available settings are located in the registry key **HKLM*.
Get-ChildItem HKLM:\SYSTEM\CurrentControlSet\Services\WebClient
From a practical point of view, the following parameters of the WebClient service may be of interest.
- AcceptOfficeAndTahoeServers — Ability to connect to Web servers with SharePoint and Office Web Server. The default value is 1 (Enabled).
- BasicAuthLevel — The type of authentication used by the WebClient service. Valid values are:
- 0 — Basic authentication disabled.
- 1 — Basic authentication enabled for SSL shares only (default value on Windows Server 2016);
- 2 or greater — Basic authentication is enabled for SSL and non-SSL shares. This setting is unsecured because the username and password are transmitted in plain text.
- FileSizeLimitInBytes — maximum size (bytes) for file transfers. The default value is 50000000 (50MB).
You don’t need to modify these settings in most cases, and the default values are sufficient.
Now that the WebDAV client is installed on your Windows Server, you can mount the WebDAV shares.
In this example, the WebDAV server URL is live.theitbros.com, which allows SSL and non-SSL connections.
Note. If you don’t have a WebDAV share to test your WebDAV client, you can use this one – http://live.sysinternals.com/. This web directory stores popular sysadmin’s utilities from Sysinternals.
Mount to WebDAV Client with Anonymous Access using the NET USE Command
In an elevated PowerShell or CMD session, run this command to mount the WebDAV share anonymously:
NET USE W: http://live.theitbros.com
Mount to WebDAV Client with Authentication Prompt using the NET USE Command
Run this command in an elevated PowerShell or CMD session to mount the WebDAV share with authentication.
# Non-SSL with authentication with a password prompt
NET USE W: http://live.theitbros.com * /USER:domain\username
Mount to WebDAV Client using the File Explorer (GUI)
- Open the File Explorer, select This PC, and click Map network drive.
- Select the drive letter.
- Type the WebDAV share URL.
- Check Reconnect at sign-in if you want this WebDAV share to be persistent.
- Check Connect using different credentials to be prompted for the credentials.
- Click Finish.
- Enter the username and password.
- Check the Remember my credentials so that your credentials are saved in the credentials manager.
- Click OK.
The WebDAV share is now mounted to your Windows Server.
Conclusion
Installing the WebDAV client on Windows Server 2016 is a straightforward process that can be completed in just a few simple steps. Following the instructions outlined in this blog post, you should be able to successfully set up and configure your WebDAV client, allowing you to access and manage your files and folders remotely.
WebDAV can be a powerful tool for improving productivity and collaboration within your organization, enabling users to work together on the same documents and files in real time.


1 comment
HI,
Some questions.
1). I’d like to login to a DBMS application that runs on Windows Server 2016 x64 bit by logging into my account and have it automatically log into to a website sharepoint drive with a different username/password and do this without prompting everytime I login to windows server 2016.
Will the /persistance:yes work here or do I also have to setup the sharepoint in credential manager on windows server 2016? What about a second user logging into their WinServer 2016 and sharepoint account and keep their username password separate from mine in credential manager. This should be able to be done in the future for digital certs on CAC cards vs. username/password.
2). If the sharepoint server has a digital cert that must be verified via a CA, does this have to be installed in the WinServer2016 intermediate or trusted Cert Store?
By exporting and importing data into the DBMS via sharepoint, one doesn’t have to copy it to ones laptop, since the laptop has been setup as a mapped drive to the sharepoint server to review and/or copy the files from sharepoint that were exported by the WindServer2016 DBMS application.