The classic way to configure a static IP address, subnet mask, gateway, and preferred/alternative DNS servers for your network connection in Windows is to use the Network Connection GUI (use the ncpa.cpl command to quickly access this Control Panel item). You can also use the modern Settings panel in Windows 11 and 10 to set your computer’s network interface settings (Settings > Network and Internet > your network connection properties > IP Settings > IP assignments). However, in some cases, it may be more convenient and faster to use the PowerShell command line to set the Windows network settings.
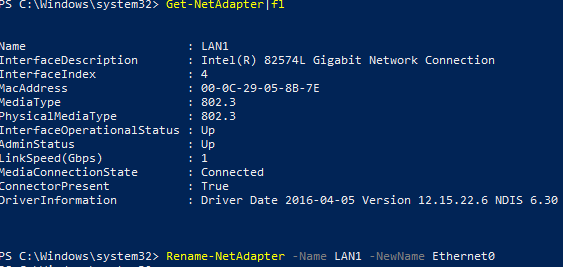
There may be more than one network adapter (Ethernet or wireless) available in Windows. To list the available network interfaces on the computer, start PowerShell prompt as an administrator and run the command:
Get-NetAdapter
In our case, the computer has only one network interface called LAN1.
You can:
- Change the network connection name:
Rename-NetAdapter -Name LAN1 -NewName Ethernet0
- Disable the network interface:
Disable-NetAdapter -Name Ethernet0
- Enable the adapter:
Enable-NetAdapte -Name Ethernet0
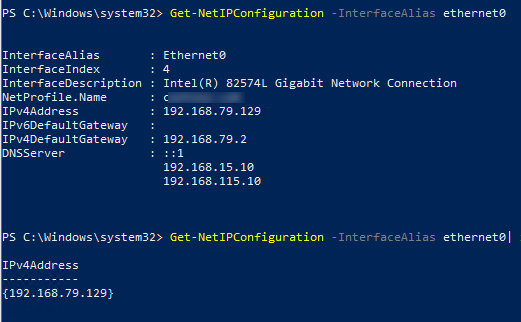
In order to display the current IP address of this connection, run the following command:
Get-NetIPConfiguration -InterfaceAlias ethernet0
Note. This is an analogue of cmd’s ipconfig command.
You can use the Select-Object cmdlet to display only the connection IPv4 address:
Get-NetIPConfiguration -InterfaceAlias ethernet0| Select-Object -Property IPv4Address
You can use the New-NetIpAddress cmdlet to set a static IP address for a network interface. For example:
Get-NetIpAddress -InterfaceAlias Ethernet0 | New-NetIpAddress -IpAddress 192.168.79.129 -PrefixLength 24 -DefaultGateway 192.168.79.2
Then you can set the DNS addresses for the network adapter:
Get-NetAdapter -Name Ethernet0 | Set-DnsClientServerAddress -ServerAddresses 192.168.79.10, 192.168.179.10
The first command may return an error:
New-NetIPAddress : Instance MSFT_NetIPAddress already exists.
To resolve the problem, you must remove the specified IP address from the persistent store:
Remove-NetIPAddress -IPAddress '192.168.79.129'
Check if the IP settings of your network adapter are changed.
To find out whether your computer has a static IP address or whether it has been assigned an IP address by a DHCP server, run the following command:
Get-NetIPAddress -interfacealias ethernet0 -AddressFamily ipv4|select IPAddress,InterfaceAlias,SuffixOrigin,PrefixOrigin

If you previously set a static IP address for the network adapter manually and now want Windows to automatically get an IP address from DHCP, run the commands:
Set-NetIPInterface -InterfaceAlias Ethernet0 -Dhcp Enabled

Get-NetIPAddress -InterfaceAlias Ethernet0 | Remove-NetRoute

Set-DnsClientServerAddress -InterfaceAlias Ethernet0 –ResetServerAddresses
Restart the network connection. This will allow the adapter to get a dynamic IP address lease from DHCP.
Restart-NetAdapter -InterfaceAlias Ethernet0
These commands enable DHCP for the network adapter and remove static IP address and preferred DNS settings.


