Businesses and individuals use automatic replies in Outlook to let senders know how their messages were received or give them further details. The common practice is to use Shared Mailboxes for these automatic replies by enabling the Out of Office.
But the Out of Office (OOF) agent only sends automatic replies once to every sender. If the mailbox receives another message from the same sender, it will not automatically reply to the sender anymore. And that feature limitation is by design.
So what’s the workaround? That’s where Power Automate comes in handy. Power Automate is a cloud-based service that allows you to automate workflows between different apps and services, including Outlook. In this blog post, we’ll create a Power Automate Outlook flow that sends automatic replies to each message it receives.
Table of Contents
Requirements
- Administrator access to the Microsoft 365 tenant.
- An Exchange Online mailbox. This post will use a shared mailbox.
- Power Automate Free license.
As you may know, a shared mailbox account cannot log in using its own credentials by design. But its login capability can be enabled by setting its password. Also, the shared mailbox account must have a Power Automate license assigned to it. Follow these steps to set up the mailbox.
- Log in to the Microsoft 365 Admin Center.
- Navigate to Users > Active users.
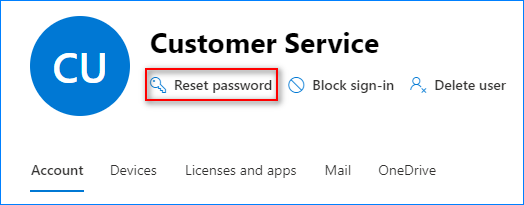
- Click the shared mailbox account. In this example, the account name is Customer Service.
- On the fly-out form, click Reset password.
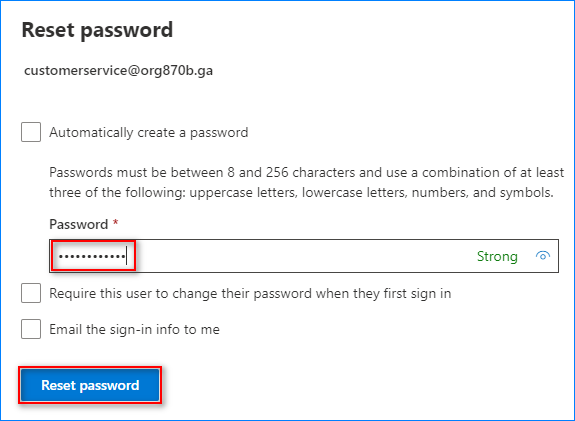
- Enter the new password and click Reset password.
- Make sure to record the password and click Close.
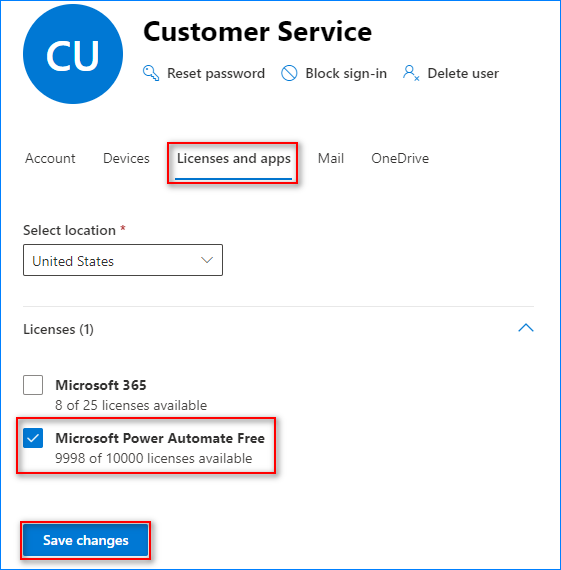
- Click the Licenses and Apps tab, check the Power Automate Free license, and click Save Changes.
The shared mailbox account is now enabled and has a Power Automate license.
Create the Power Automate Flow
Now that the Power Automate shared mailbox is ready, let’s create the Power Automate Flow needed to monitor the mailbox for new messages and send automatic replies.
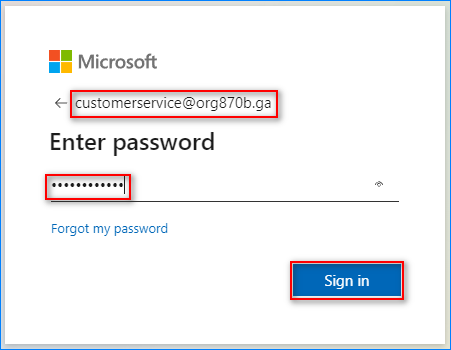
- On a new browser, open the Power Automate Sign In page.
- Sign in using the shared mailbox credentials.
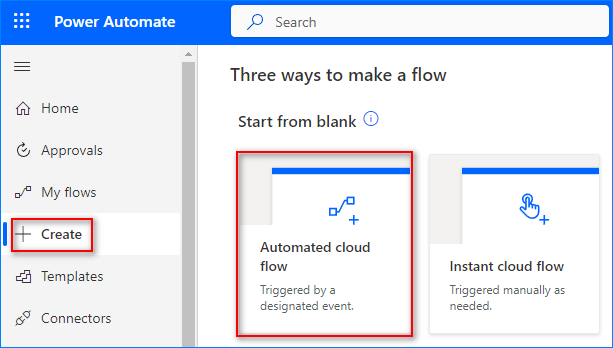
- Once logged in, click Create on the left side. There are many blank flows and templates. But in this example, click the Automated Cloud flow, which is correct for this use case.
Create the Flow Trigger
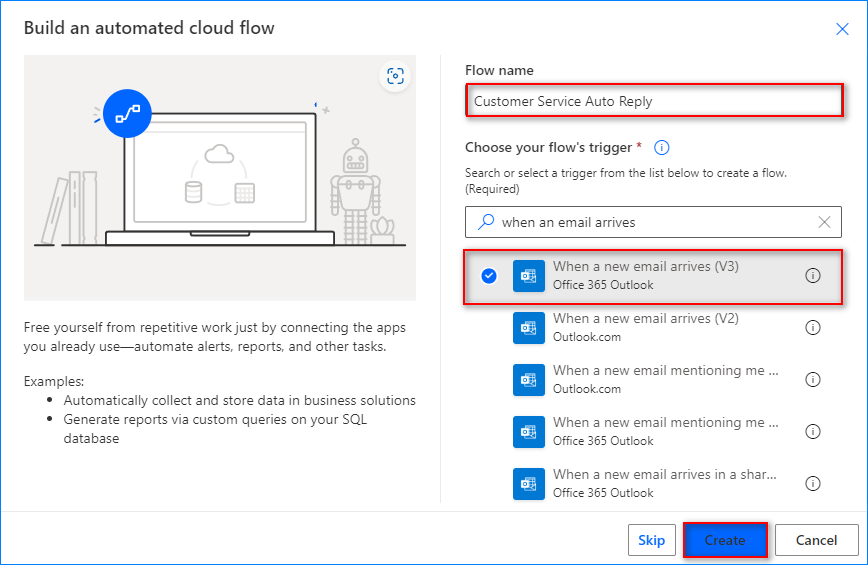
- On the Build an automated cloud flow pop-up, enter the Flow name. In this example, the flow name is Customer Service Auto Reply.
- Under “Choose your flow’s trigger,” select “When a new email arrives (V3)”, and click Create.
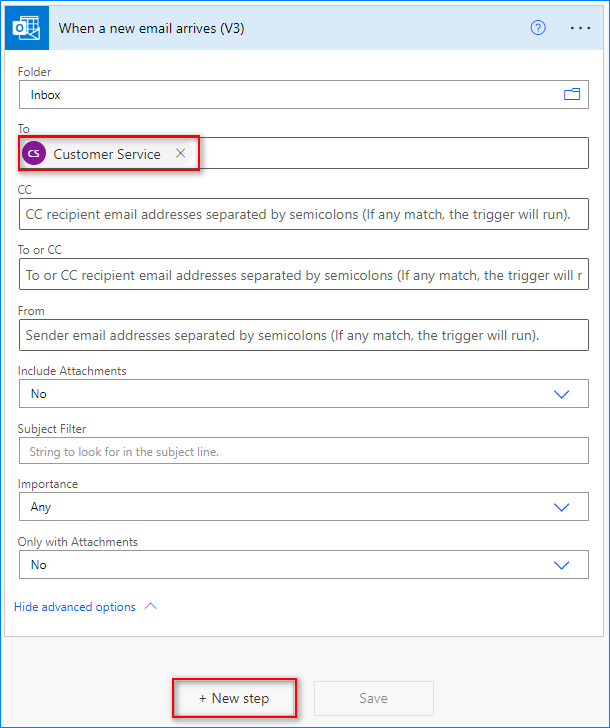
- In the “To” box, enter the shared mailbox email address. The flow will be triggered only when the “To” recipient in the new message matches this email address.
Related post. How to add or remove SMTP alias to Exchange mailbox?.
Click New step.
Add the Flow Action
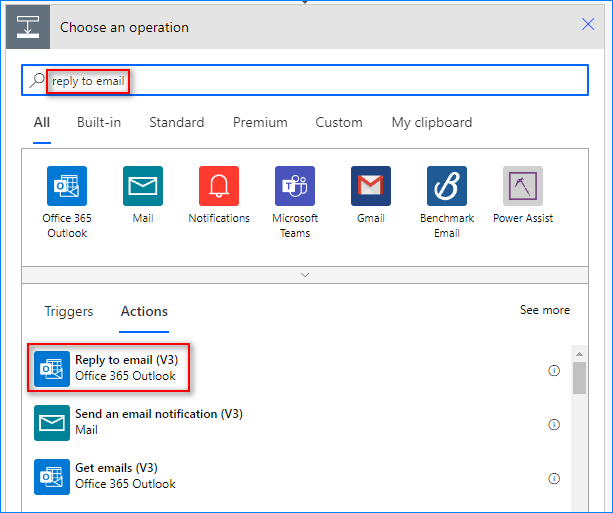
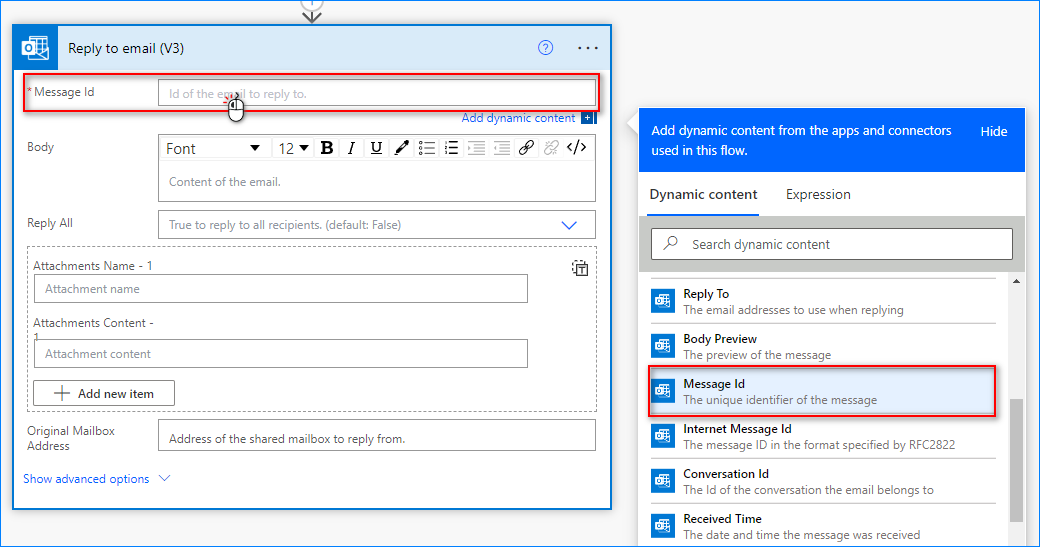
- Search for “reply to email” and select “Reply to email (V3)” under Actions.
- Click the “Message Id” box and select “Message Id” from the list.
- Type the automatic reply message in the “Body” box.
- In the “Original Mailbox Address,” enter the shared mailbox email address. This address will be the sender of the automatic reply message. Click Save.
Test the New Flow
The flow is ready, but it is recommended to test whether it works. This way, you can confirm whether the flow is as expected or if you’ve missed a step.
- Click the Test button.
- On the Test Flow fly-out, choose Manually and click Test.
You’ll see a banner like the one below. This means the flow is waiting for a new message to arrive in the mailbox.
- Send a message to the shared mailbox using your (or another) mailbox.
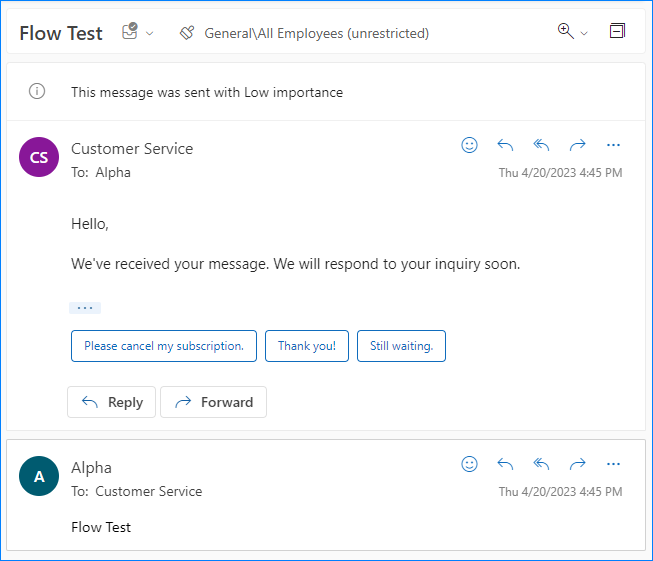
- Wait a few moments, and you should receive the automatic reply from the Power Automate Outlook flow.
- Go back to the Power Automate Flow, and you will see the confirmation banner saying, “Your flow ran successfully.”
Conclusion
When setting up automatic replies in Outlook, Microsoft Power Automate can provide significant advantages over the traditional Out of Office (OOF) agent. Firstly, Power Automate offers more customization options, allowing you to tailor your automatic reply to suit your needs. With OOF, you’re limited to a standard message that may not convey all the necessary information to your contacts.
Secondly, Power Automate allows you to set up automatic replies for complex scenarios, such as forwarding emails to a colleague or escalating urgent messages. OOF only offers a basic reply, which may not be sufficient for some business situations.
Thirdly, Power Automate can be integrated with other Microsoft services, such as SharePoint or Teams, enabling you to create more streamlined workflows. OOF does not offer this level of integration.
Finally, Power Automate provides a more reliable and consistent way to set up automatic replies, with less risk of errors or technical issues than OOF. Using Power Automate for automatic replies in Outlook is a more flexible, efficient, and comprehensive solution than the traditional OOF agent.






5 comments
Hi Cyril
Let me firstly thank yoiu very much about this site you created. it is really good site and very informative and you can see that you took lot of time doing this.
Thank you, Desmond. Would like Google to hear that… :(
This is grate!
Could you recommend a condition that would limit the reply back to the conversion to only once per 24 hours as an example?
You could add steps to record the email address and timestamp in a file or SharePoint list and query that record to confirm if the last reply was within 24 hours.
This is wonderful. I needed an auto reply on a shared mailbox that would send the reply every time, not just the first time. This did the trick!