Outlook Mail Merge feature allows you to send personalized e-mail messages to a large number of recipients. It is usually used when there is a need to send bulk emails containing personal information, such as personal newsletters, greeting cards (with the same text, but unique name, address), cards with login name and password, etc. In this article, we will look at an example of how to use mail merge in Outlook for bulk mailings.
In order to send a mailing using the Outlook Mail Merge, you will need the following items:
- List of contacts (recipients)
- Template for an email to be sent
First, select the Outlook contacts you want to email.
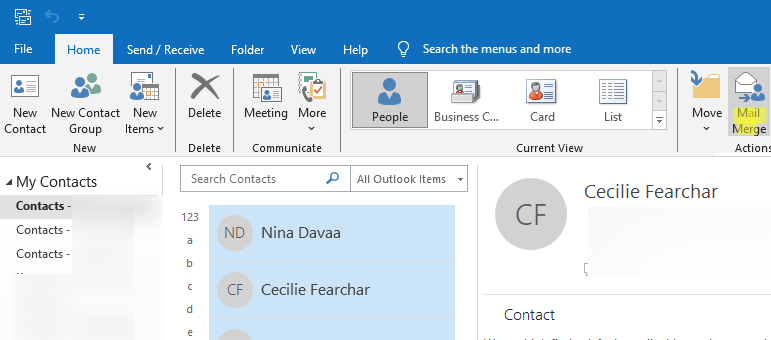
- Go to the Contacts folder (or press Ctrl+3 for quick navigation);
- You can filter the list of contacts for the mailing by any criteria. To enable the contact filter, go to the View > View Settings > Filter and configure the filter criteria;
- Click the Mail Merge button in the Actions pane in the Ribbon after you have selected the contacts you need;
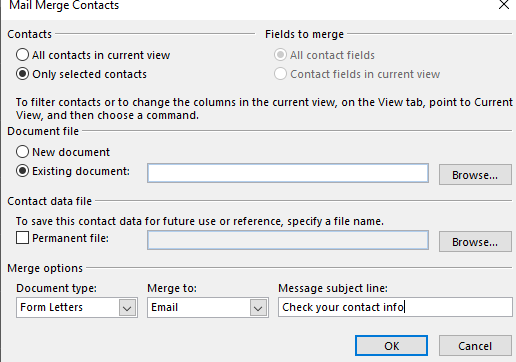
- As we don’t have a mailing template yet, select New document;
- In the Merge options, choose:
Document type: Form Letter
Merge to: Email
Message subject line: <your text>
- Click OK. A new Word document window will open. You must create a text template for your mailing in this document.
- Insert the text of your email into a Word document. You can then add personal fields to display in the email.
In this example, we will add a personalized greeting and information about the user’s address and phone number.
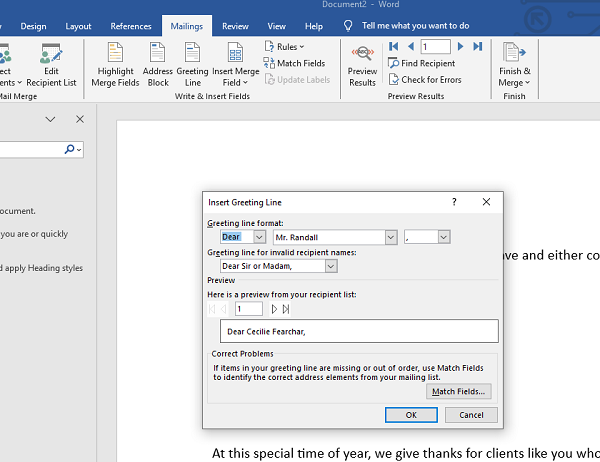
- On the Mailings tab, click the Greeting Line button to add a greeting. Select the format of the greeting you want to use;
- This will add this line to the document:
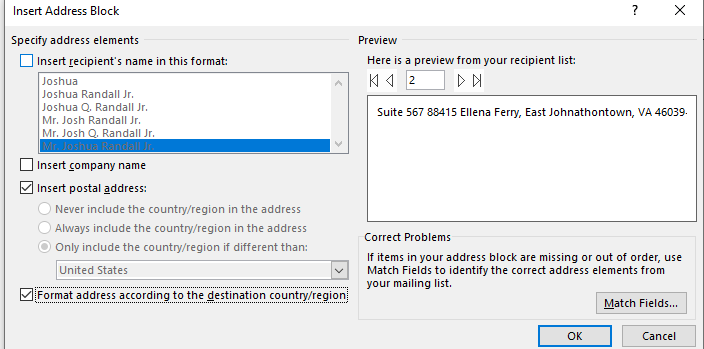
«GreetingLine» - Then select the position where you would like to insert the address information and click on the Address Block button on the ribbon;
- Select the fields from the address to add to the email;
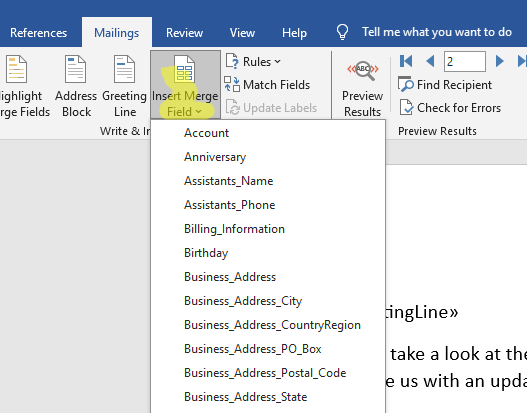
- You can add any other fields from the user card from Contacts using the Insert Merge Field drop-down menu. Values can be placed anywhere in the document. In this example, we have added a field called Business_Phone;
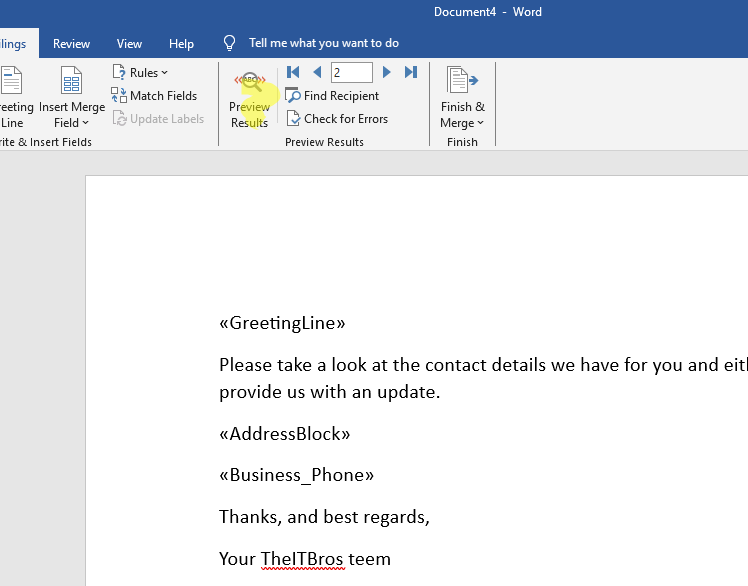
You can see how your mailing will look in the recipient’s inbox once you have prepared the template.
Click the Preview Results button. Word replaces all fields with information from user’s Outlook contacts card. You can view all personal messages by moving to the next/previous contact using the arrow buttons in the ribbon toolbar. In the screenshot below, we’ve highlighted the values Outlook automatically populated.
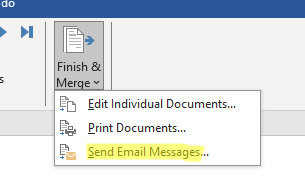
When you are ready to send emails to recipients, click Finish & Merge > Send email messages.
Click OK to start the mailing process.
Word will generate a letter for each user and send it through the configured Outlook profile to the primary e-mail address specified in the user’s contact. You can view all the e-mails that were sent in this mailling in the Sent Items folder in Outlook.
You can save your Word document to use as a template for your next Outlook mail merge.
Note. You can use an Excel spreadsheet as a mail merge source. In this case, you will be able to add fields to the mailing template that are not available in the standard contact card.

